|
Hey! I am here today to show you a beatiful stamp from Crafty Meraki called Elegance, and boy is it elegant! I decided to do some no-line Copic coloring with beauty and it turned out so beautiful! I decided to color the leaves in brown tones since we are heading into the fall season. One trick I learned when no-line coloring - Stamps always come with the image printed on the acetate that the stamp comes with. I use that printed image to guide me on where the lines are on my card panel. Helps me A LOT! The background die is the Bubble Mania die from Crafty Meraki and I added some splatter using some Tim Holtz Distress spray. I love how this turned out! Happy Crafting Y'all! 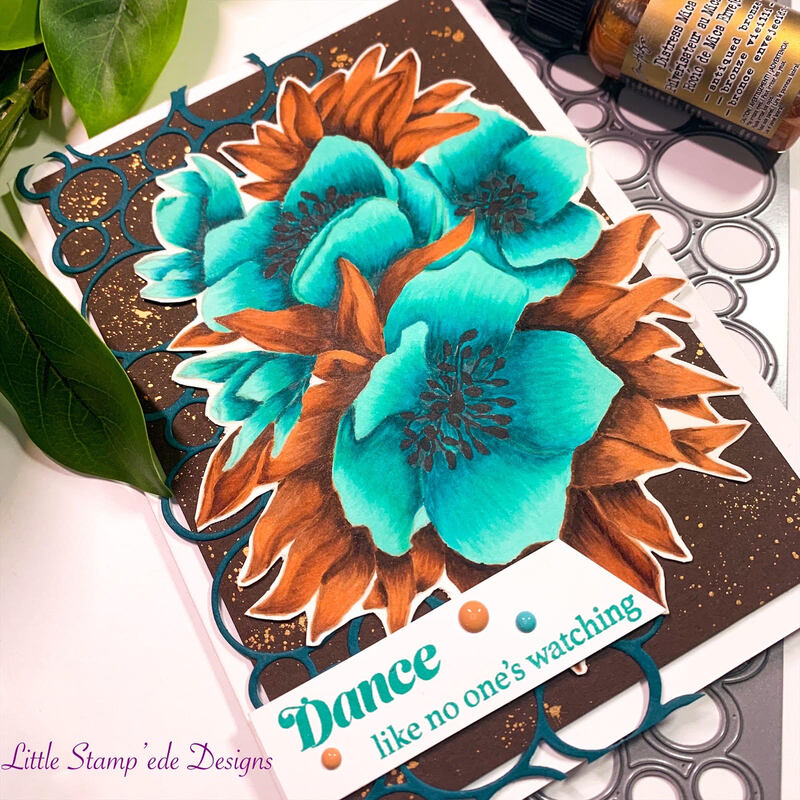 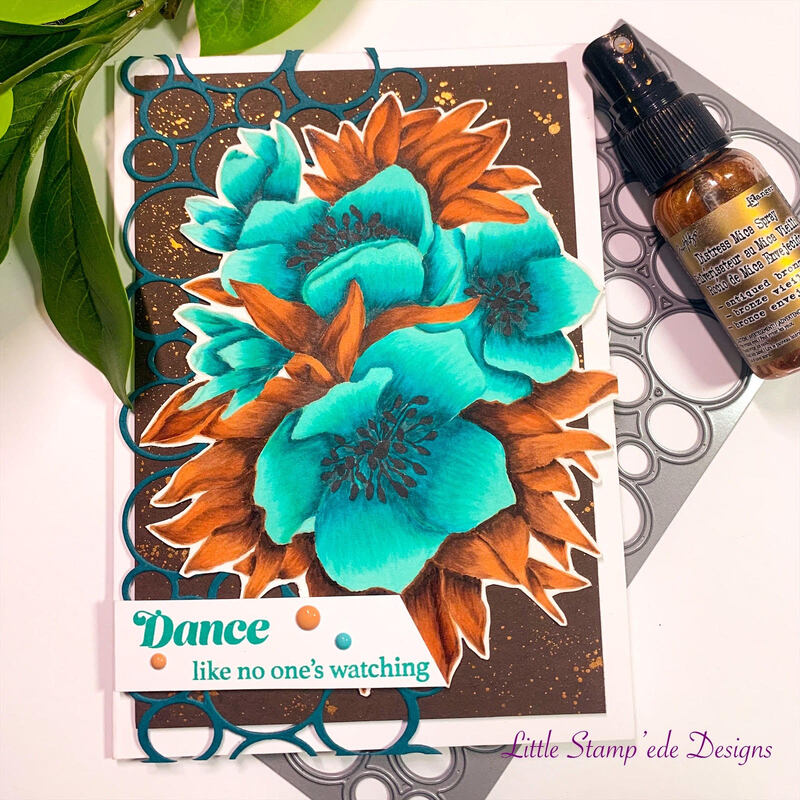 Hey there! I am still laid up wiith my broken ankle but I hobbled into my craft room for this fun release. I was picked by Simon Says Stamp to receive this awesome stamp before it is released to the public to promote it and it is so fun to play with! I am lucky to have a bestie that came over to help me put this together by grabbing everything I needed that was out of arms reach! Love her! This fun stamp set is called Lined Leaves and I decided to heat emboss the images with Wow! Copper embossing powder. I embossed on both vellum and cardstock and then layered the leaves with foam tape and Bearly Art Glue onto a card panel that was stamped with another SSS background stamp. I then added some splatter with Tim Holz Distress spray. I love how this turned out. Gotta go but I hope to see you all real soon! Happy Crafting Y'all! 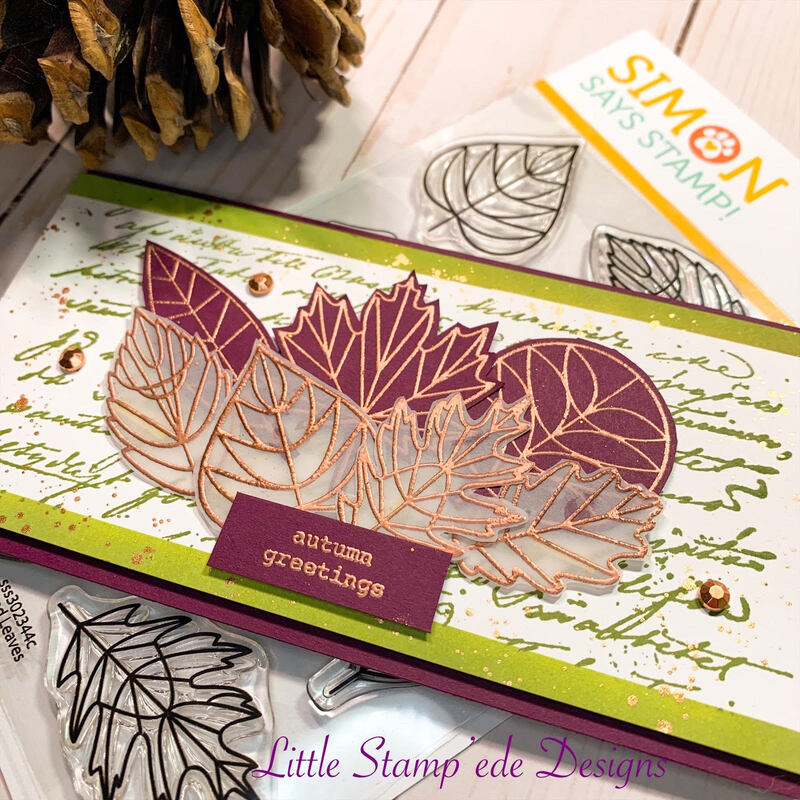 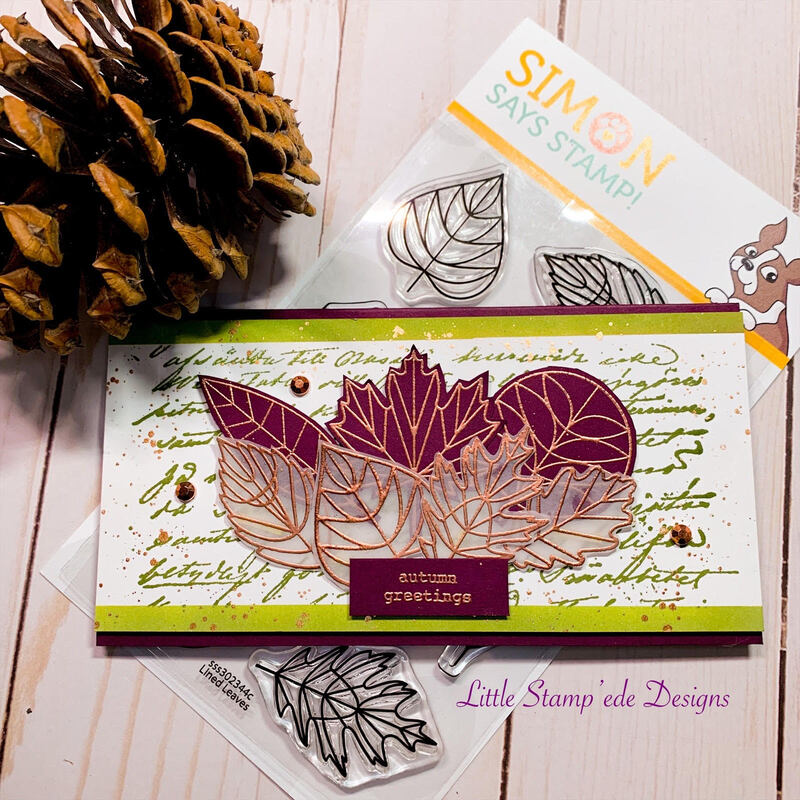 Hello everyone....so yesterday I fell and broke my ankle in three places. I am waiting for surgery next week and it will be a long healing time, so I will not be crafting in the next six weeks. I hope you all keep crafting and see you all after I can get back into my craft room!
Hey everyone! It has been a busy week! I hope you all are staying cool during this hot summer! I LOVE Tim Holtz and I LOVE the look of mixed media so I gave it a go. I have dabbled in the mixed media world from time to time, and I usually tend to lean towards the browns when I do mixed media, but I chose to go black this time. I wanted to use the Cocktails Blueprint stamp set from Tim Holtz Stampers Anonymous and make it bright and tropical while still making it look mixed media. I am pleased with the results! I first got out my Distress Oxide inks and did some ink blending for the background using Wilted Violet, Mermaid Lagoon, Spiced Marmalade, Mustard Seed, Kitsch Flamingo and Festive Berries. I then added some white Gesso on the left side of the card panel. I then stamped the cocktail image on the gesso side of the card and colored it with Prisma colored pencils. I then added some images from the Ultimate Grunge and added some platter using Distress Sprays and then used Distress Ink Black Soot on the edges. I really love how it came out. I need to practice more but I am pleased with the results. I hope you like it! I will see you all this weekend! 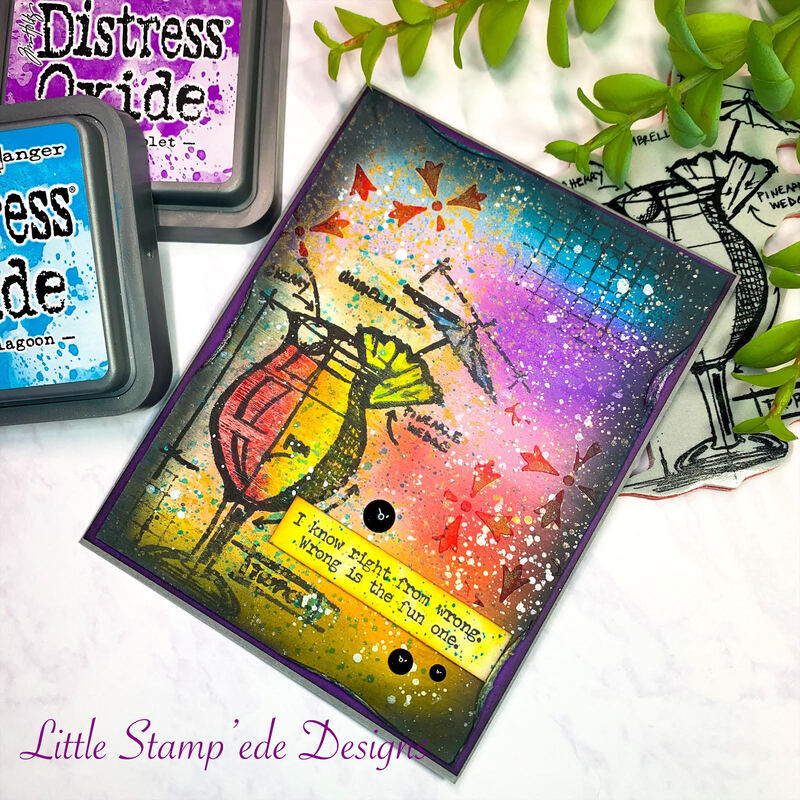 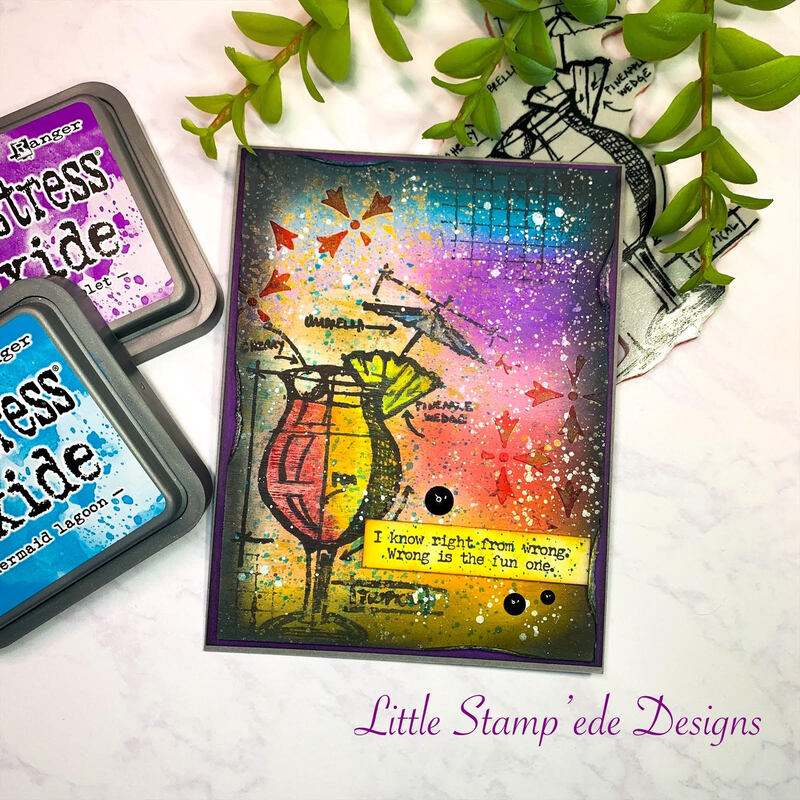 Happy Sunday everyone! I hope you all are having a great weekend! Here in Northern Cali, we are having a heatwave and it has gotten up to 108 degrees today! A great day to stay in the air conditioning! For today's card, I wanted to show a very quick and simple card to make. Pinkfresh Studio's has come out with some great stamp/stencil/die bundles that are so beautiful! I decided to play with the Be Strong bundle and it is so cute! There are 5 stencils with this bundle and they are numbered, so I just layered on the color in the order of the stencils using the colors Icing On The Cake, Over Coffee, Do-Si-Do, Polished and Rouge inks from Catherine Pooler. I then used the coordinating die to cut them out. I then used one of the mini slimline dies from Pinkfresh's Mini Slimline bundle. I then grabbed the Old Letter 1878 background stamp from Simon Says Stamp and inked it up with Coral Cabana ink from Catherine Pooler and then added some splatter using Nuvo Mica Spray. I then rearranged the flowers the way I wanted them on the card panel, then laid down Press N Seal on top to keep them on the order I wanted them. I then added some foam tape and laid them back on top of the card panel. I then glued the card panel on top of the card base using Bearly Art glue. I then stamped sentiments using the Perfect Sentiments from Pinkfresh and cut them out with the coordinating die. I then popped it up with foam tape and Bearly Art glue. I then added some enamel dots I had from Gina Marie Designs. I love how it turned out and it was a quick and simple card to make. I hope you all are staying cool and see you all in a few days! Happy Crafting Y'all! 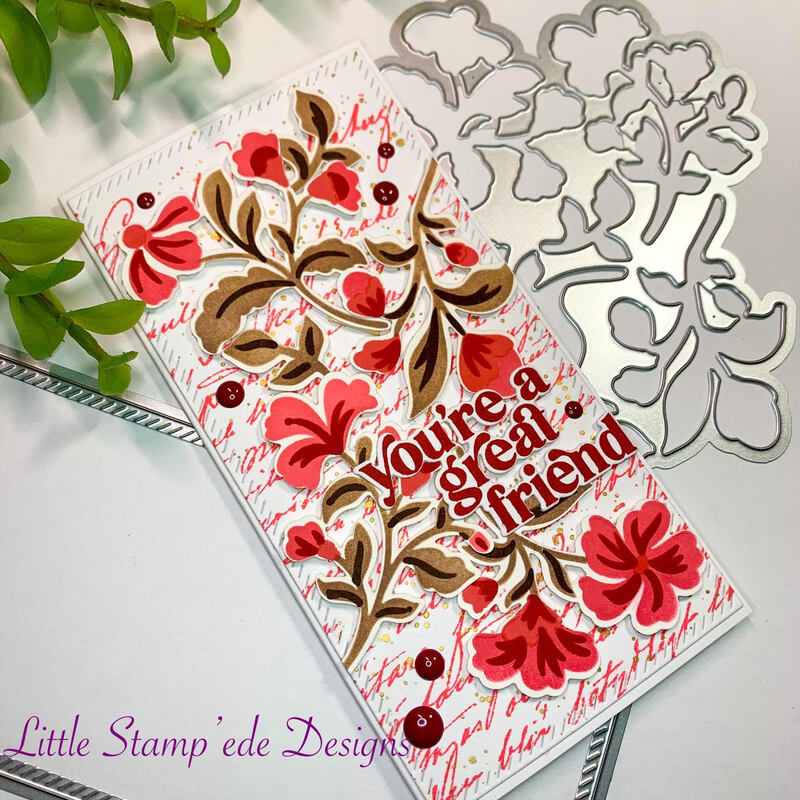 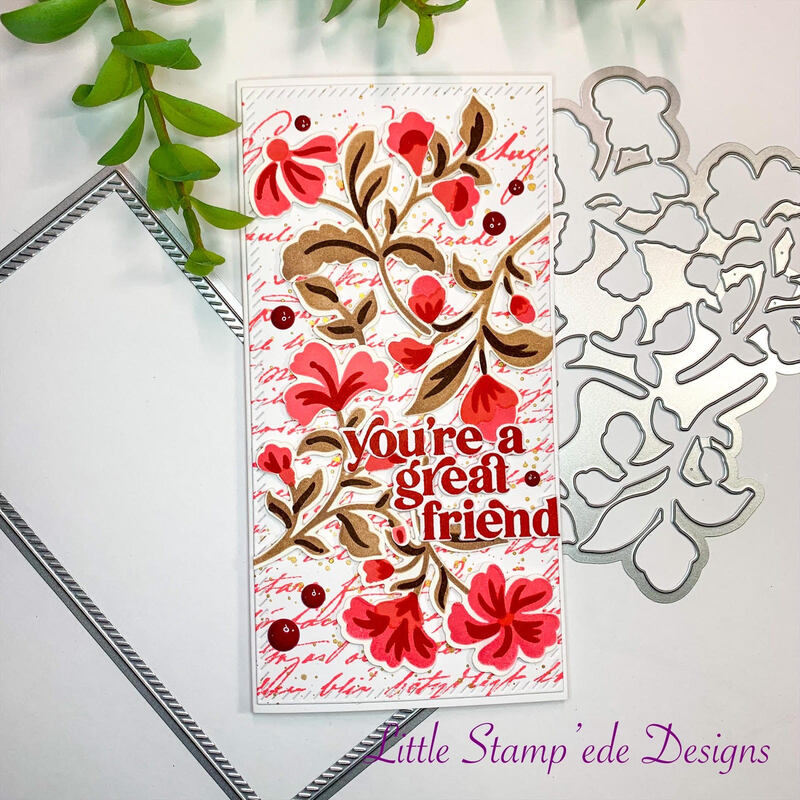 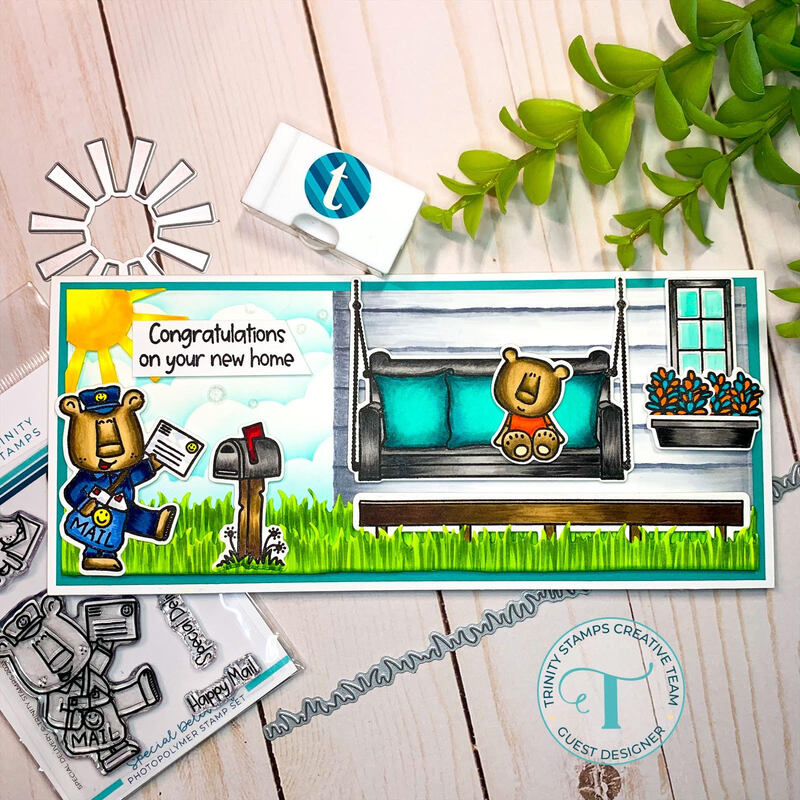 Hey everyone!! I am excited to be a Guest Designer for Trinity Stamps 3rd Birthday New Release! We are having IG Hop so I hope you all will come hop with us! For my project, I highlighted the Special Delivery and Cozy Cottage Porch stamp sets and dies from the new release! I also used the Rainbow Funshine Die set, The Great Outdoors Border and Builders Die set and the Puffy Cloud Layers stencil from Trinity to help complete this scene! I used Copic markers to color the images and the colors I used are B39, B37, B34, B23, B21, BG78, BG45, BG34, BG23, BG11, E87, E47, E44, E43, E42, E41, YR18, YR16, YR07, YG67, YG25, YG01, Y19, Y08, Y06, C5, C4, C3, C1, T8, T7, T6, R39, and R29. I stamped each image with Hero Arts Intense Black ink and cut them out with the coordinating dies and colored them. I used Salvaged Patina Distress Oxide ink for the cloudy sky. I hand drew the house background using the C and T's gray colors. After I colored everything, I put the scene together using a combination of foam tape and Bearly Art glue. The sentiment is from the Cozy Cottage Porch stamp set. I then used some Trinity Crystal Clear Embellishments to add some sparkle. I love how this scene came out! Come hop with us for a chance to win a $25 gift certificate to Trinity Stamps! See you all later this weekend! Happy Crafting Y'all!! 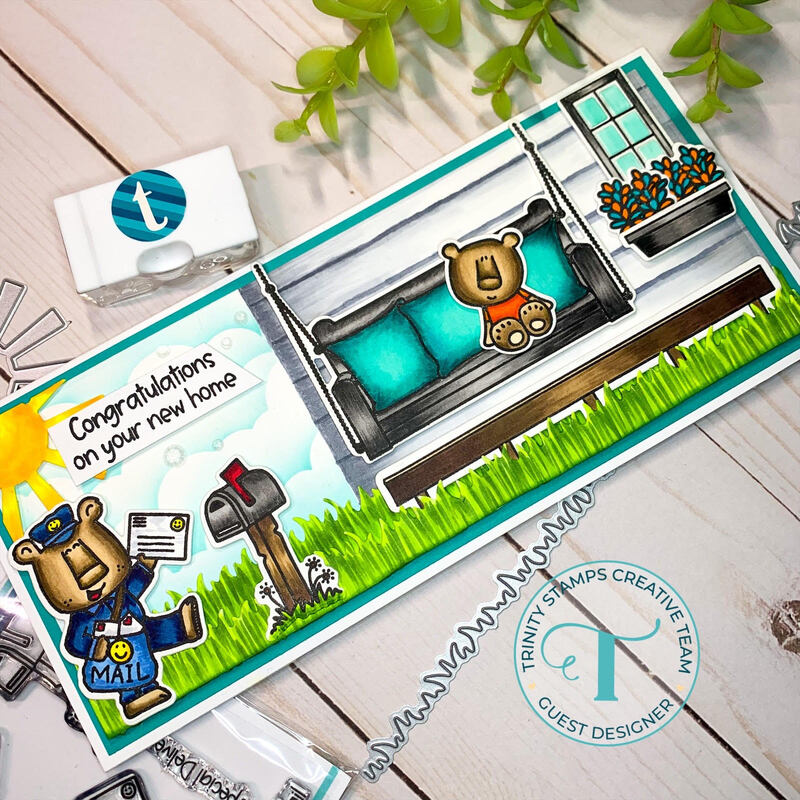 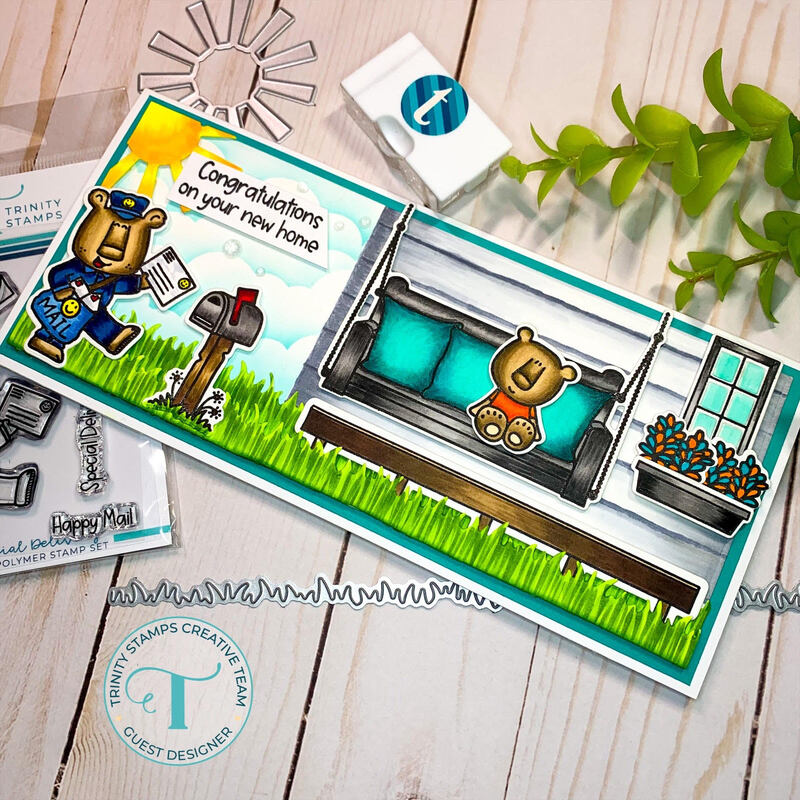 Hello everyone! So...I found a new stamp company, Pawsome Stamps! For those that know me know that I live near Happy Camp, CA and work in Happy Camp, and this stamp set is called Happy Camper, so of course I had to get it! For this project I used the Slimline Staggered Rectangle die from Trinity Stamps, and did some ink blending using Chipped Shapphire, Seedless Preserves and Picked Raspberry Distress Ink from Tim Holtz. I stamped the images with Hero Arts Intense Black ink and colored with Copic colors YG67, YG63, YG25, YG13, YG01, E79, E27, E25, E15, E13, C7, C6, C5, C3, Y06, Y02, Y00, RV69, RV19, RV17, RV14, RV09, RV04, V17, V15 and V09. I popped the rectangles with foam tape and used Dr. Martin's Bleed Proof White to splatter the starry night. I then used Bearly Art Glue to glue down the images and sentiment and used some bling from Trinity Stamps. I love how this turned out. I will definitely use this stamp set again! I hope you all have a great day and I will see you all tomorrow for the Trinity Stamp New release IG Hop!! Happy Crafting Y'all!!  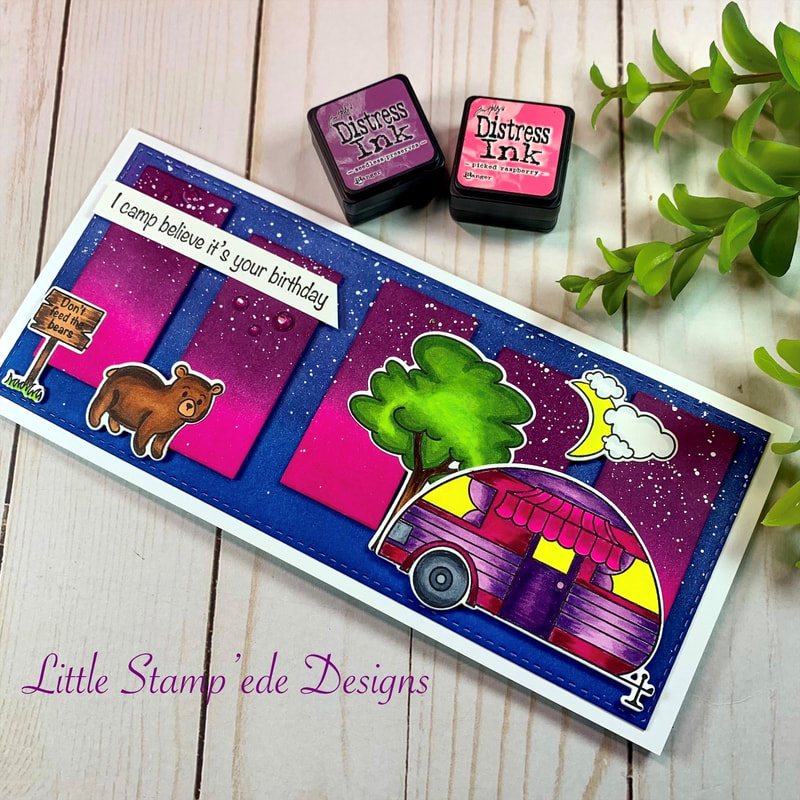 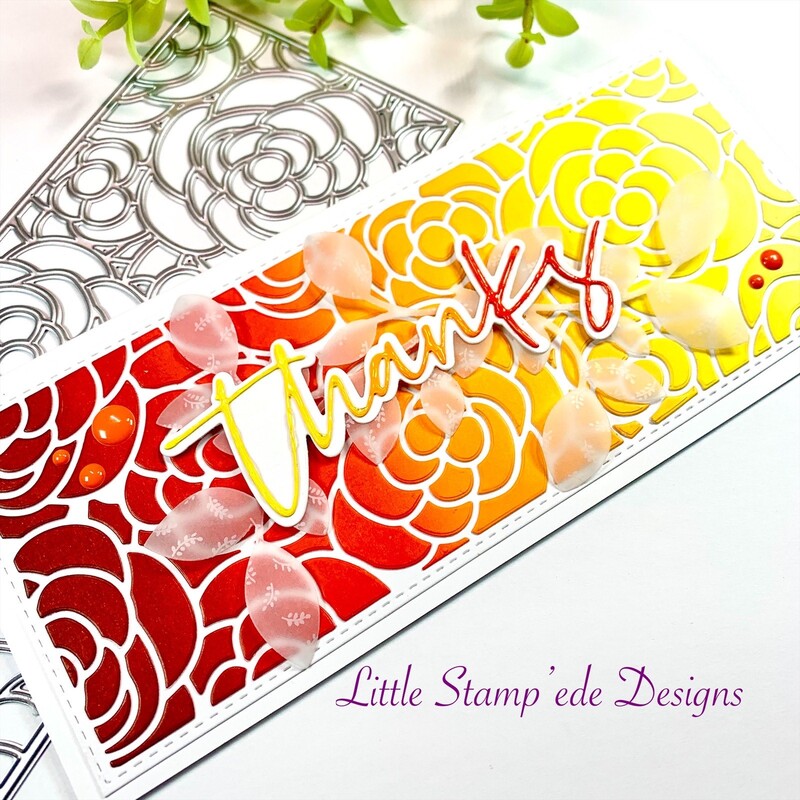 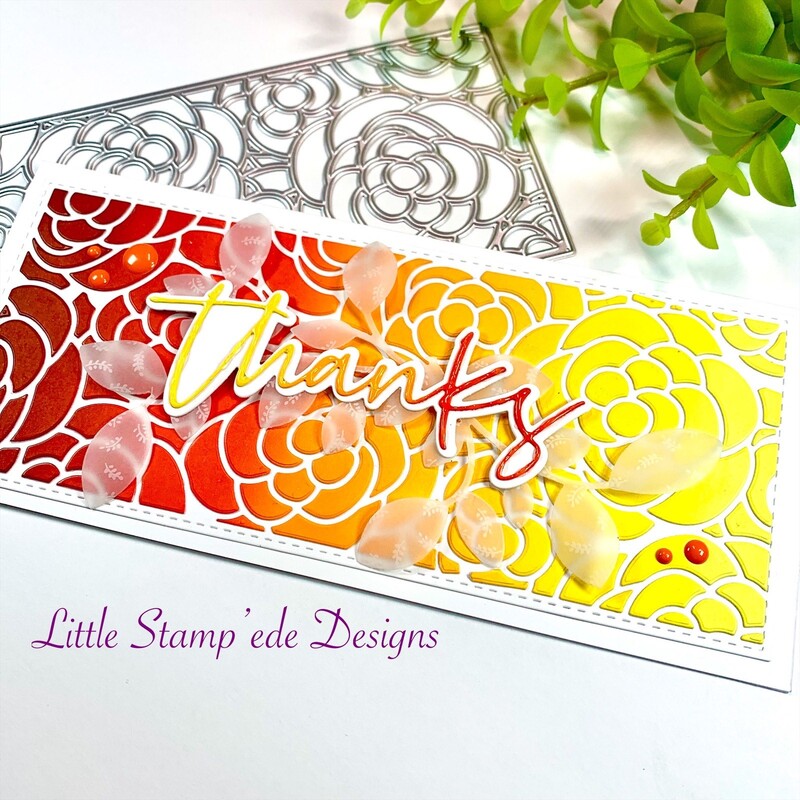 Hey everyone! When I first seen the Slim Rose Bloom die from Scrapbook.com, I knew that I had to have it! It is so beautiful!! And what is better than being able to make two cards with one die! Here you will see two very different cards using the positive and the negatives from the die. I first did some ink blending using Cranberry Fizz, Rockin' Red, Samba, Tiki Torch, Catching Rays, Limoncello and Chiffon inks from Catherine Pooler. I then die cut the rose image with the Slim Rose Bloom die. Using the negatives pieces, I carefully pieced it together using the die has my puzzle guide and glued them onto the card panel using Bearly Art Glue. The great thing about this glue is that it has a little wiggle room before it sets which helps a lot in this process! I then cut out the sentiment using Brutus Monroe's Christopher's Sentiments and added some Glossy Accents to add some shine. I then cut out some Cluster Leaves from Simon Says Stamps out of vellum. The vellum had some cut leaf designs on it that adds that extra pizazz! I popped the sentiment with foam tape and glued the leaves with Bearly Art glue under the sentiment. For the other card, I used the positive piece and did some ink blending for the background using Grape Crush, Suede Shoes, and Grass Skirt to make a rainbow looking card. The sentiment is the Miss You dies from Simon Says Stamp and I added some Glossy Accents to add some shine. Both cards have some bling that I had in my stash. This die is a must have! I love it!! I hope you all have a great week and I will see you in a few days!! Happy Crafting Y'all!! 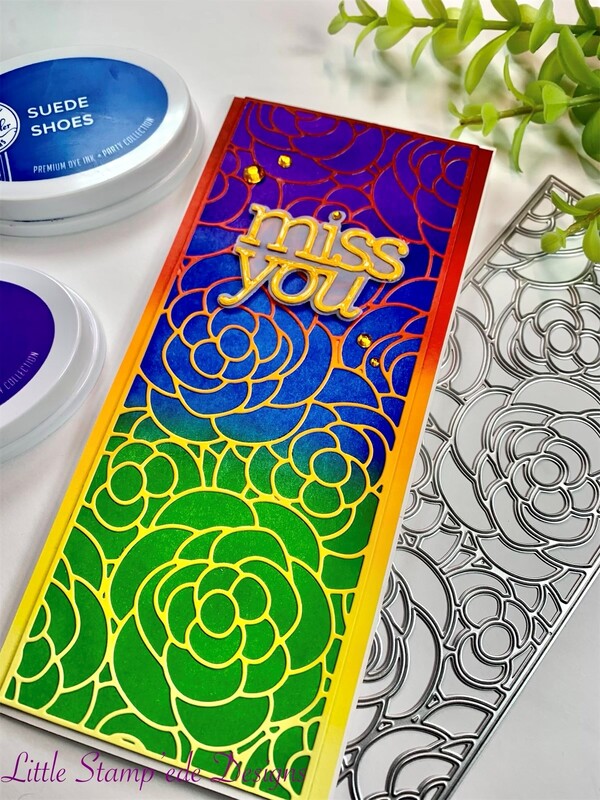 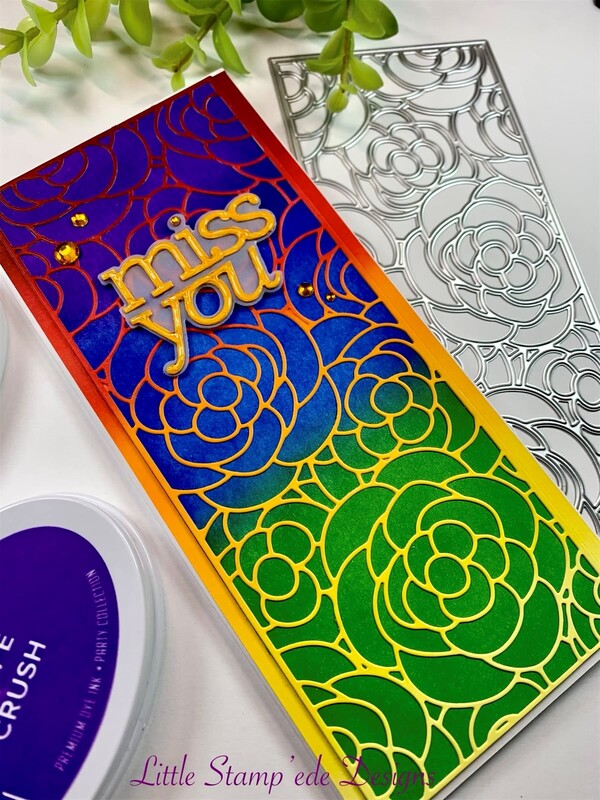 Happy Saturday everyone!! What are you all up to this weekend? Here in Northern Cali, it is 106 degrees, so I am going to stay indoors and clean some house and of course craft! For today's card, I played around with the new release from Concord & 9th Bold Butterflies, Butterfly Perfect Pairing dies and some alcohol inks. What fun! I made the alcohol ink background with Tim Holtz's Pearl inks Intrigue and Villanous...what a beauty! I then cut the Life Is Beautiful die and used Grape Crush ink from Catherine Pooler to color and then used Glossy Accents to make it shiny and then cut another image with fun foam to make the sentiment die pop. While that was drying, I stamped the butterfly images from the Bold Butterfly stamp set using Pucker Up, Be Mine, Grape Crush and Flirty Fushia inks from Catherine Pooler. I then cut a piece of cardstock to go down the middle of the card and inked it with Pucker Up ink. I then glued it onto the card panel using Bearly Art glue and then popped the sentiment die on top after I glued it onto the image cut in fun foam. I then popped the butterflies using foam tape. I then stamped the sentiment and used the die that came with the Butterfly Perfect Pairing dies to cut the sentiment out and popped it over the glossy sentiment. I then glued the card panel onto a 110lb white card base and added some bling I had from Queen & Co. It came out great! I hope you all like it and have a great weekend! See you all in a couple of days! Happy Crafting Y'all! 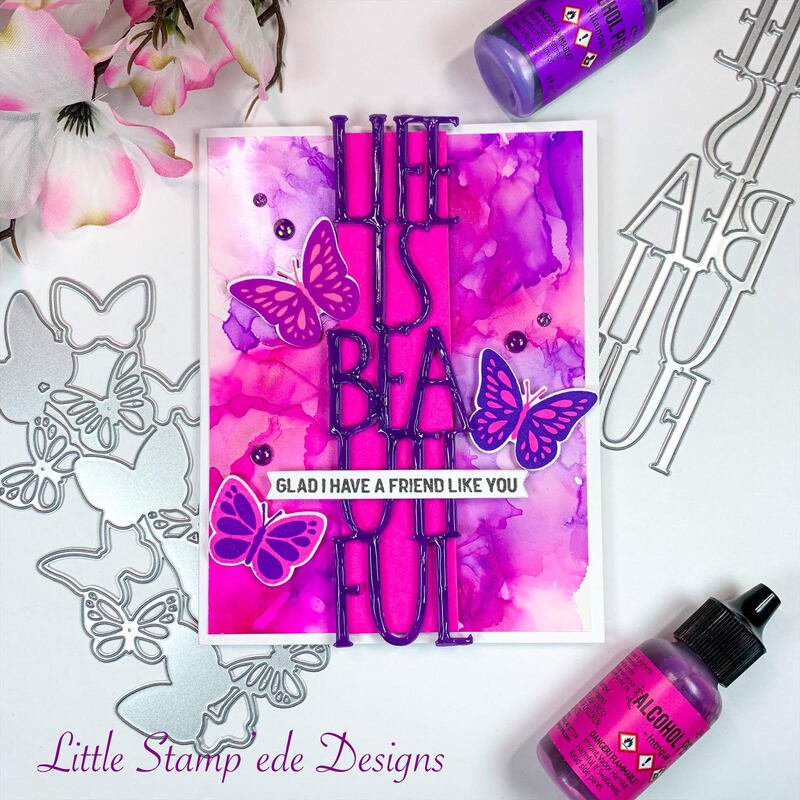 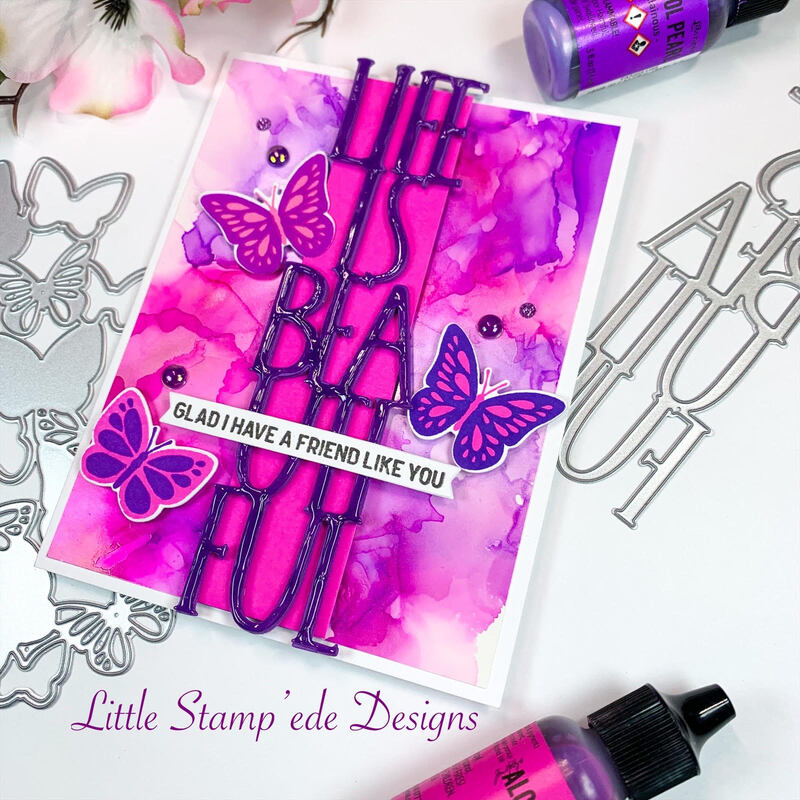 |
Follow Sammi:
AuthorI love to create and invite you to join me in my journey in this crazy paper crafting world we live in! 
Archives
February 2022
Categories |
 RSS Feed
