|
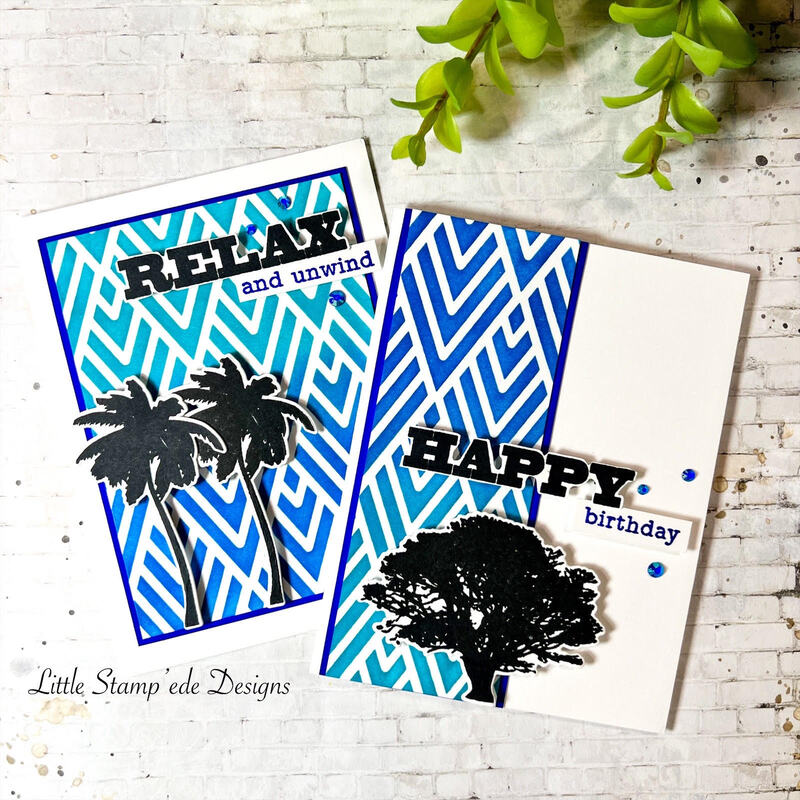
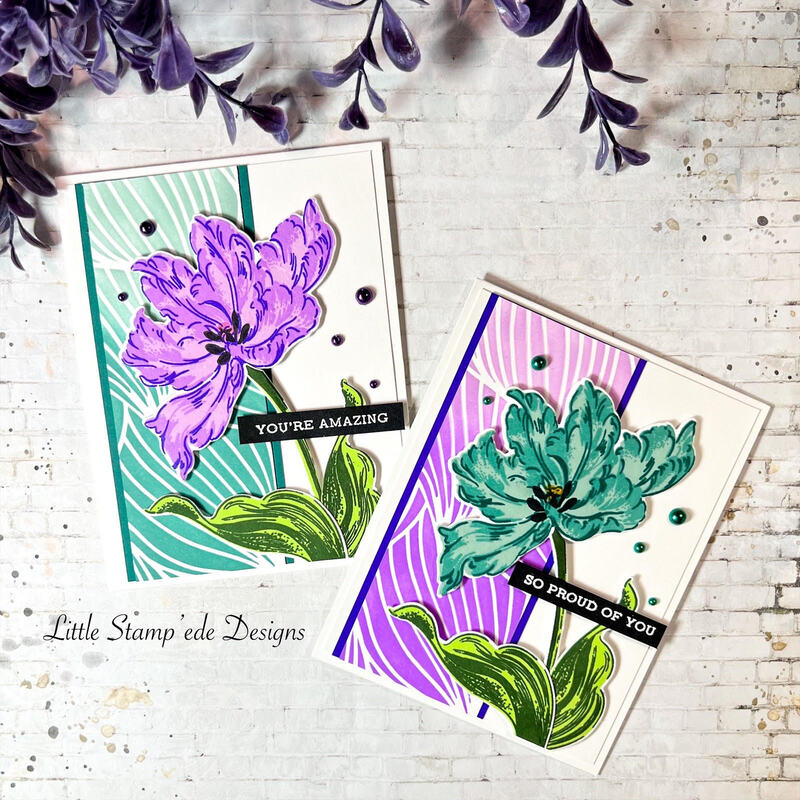
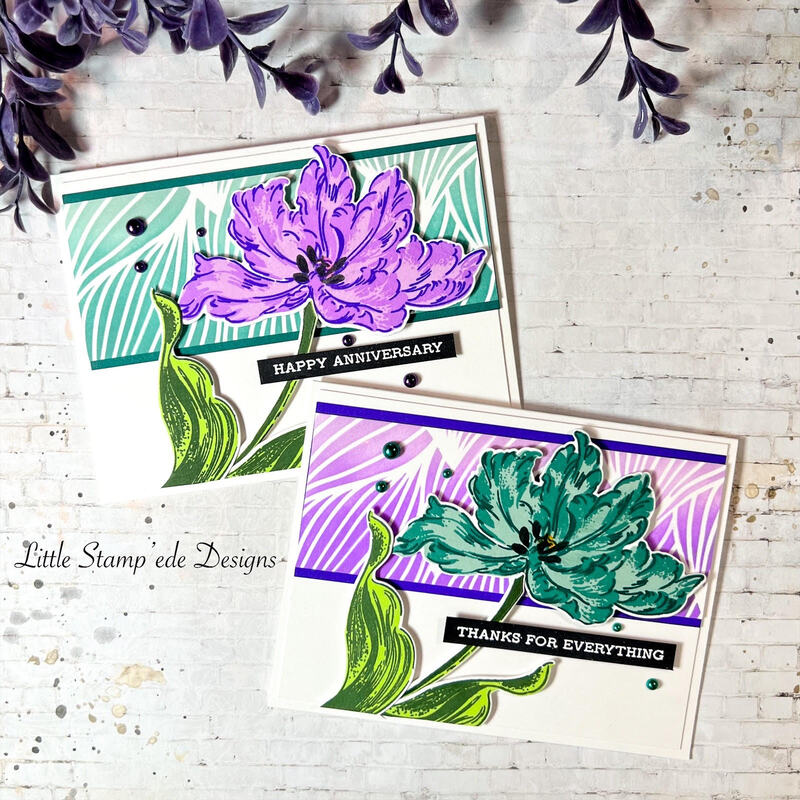
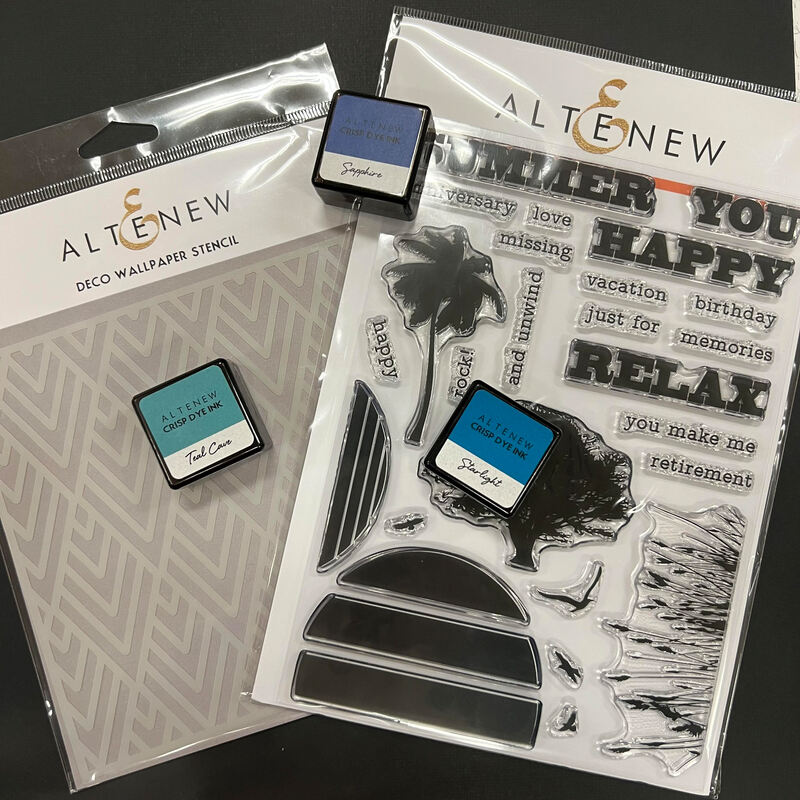
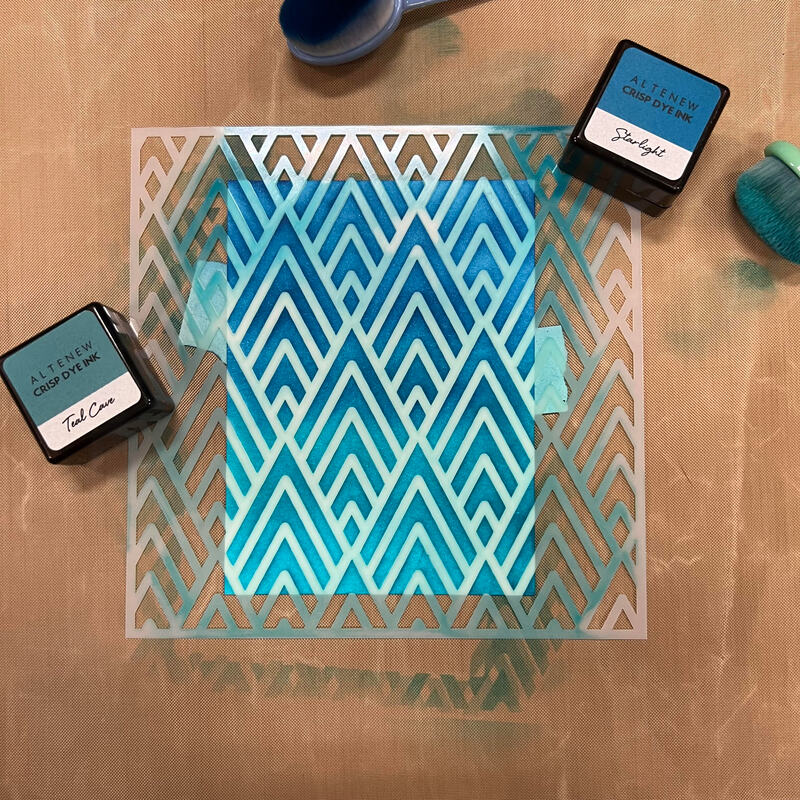
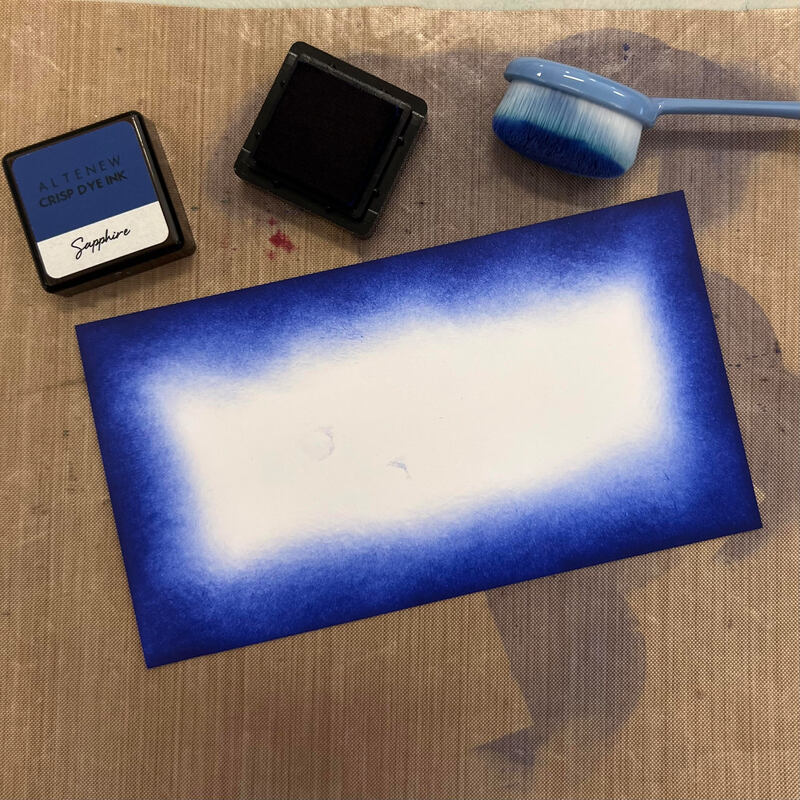
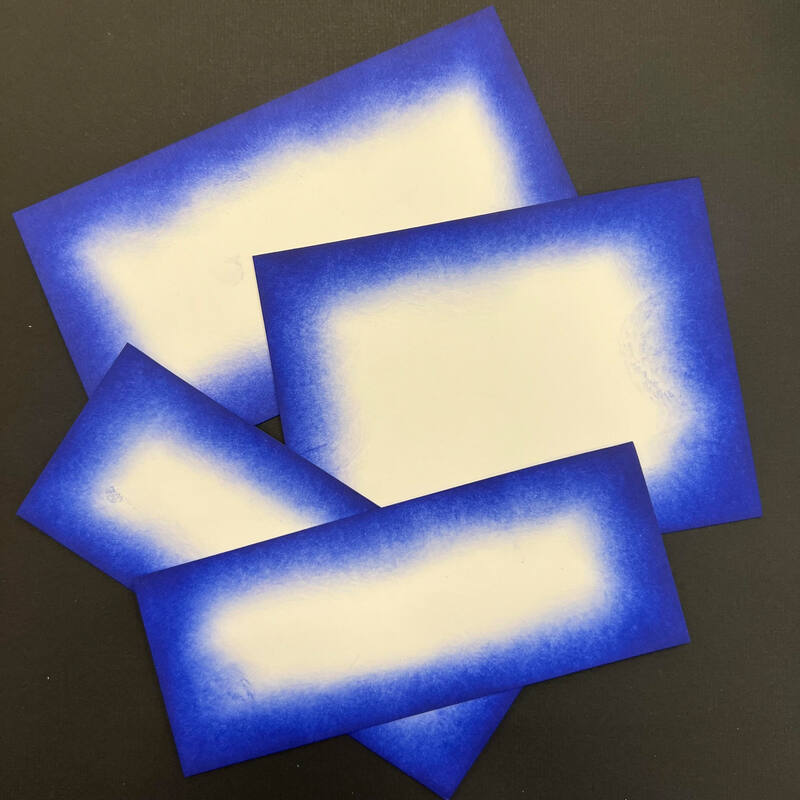
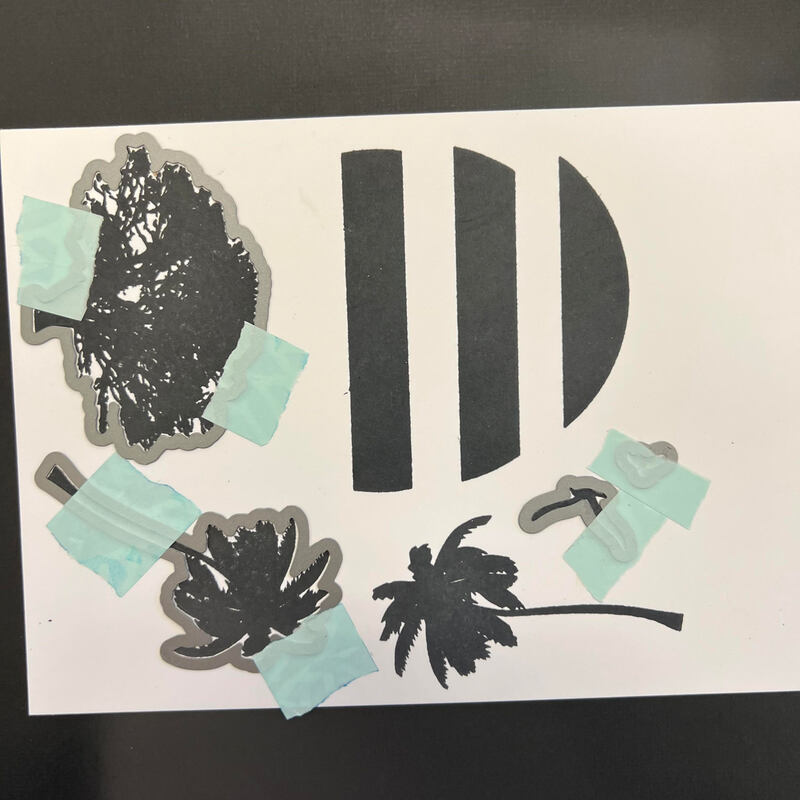
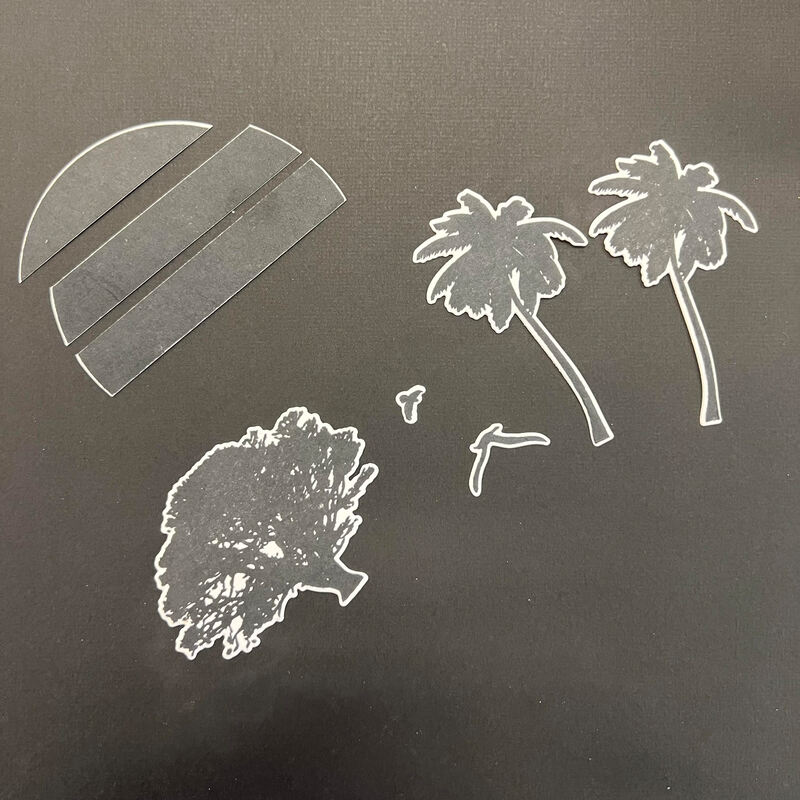
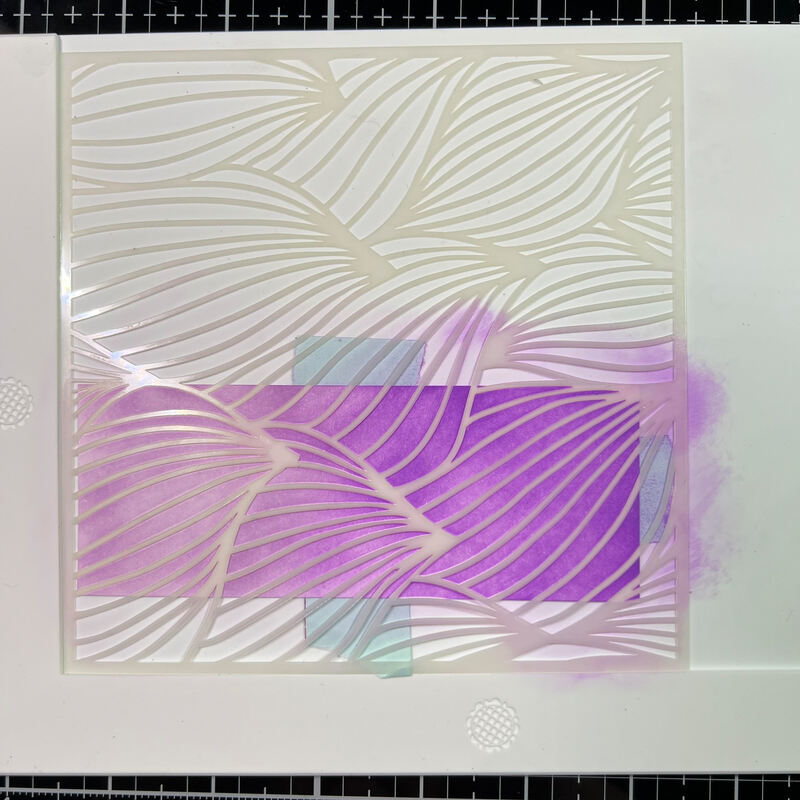
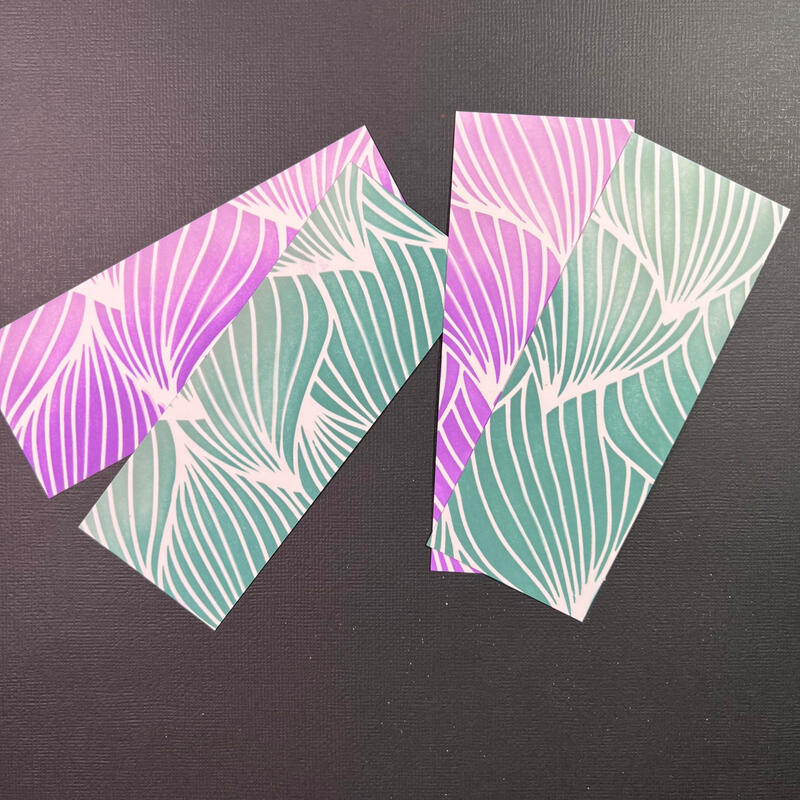
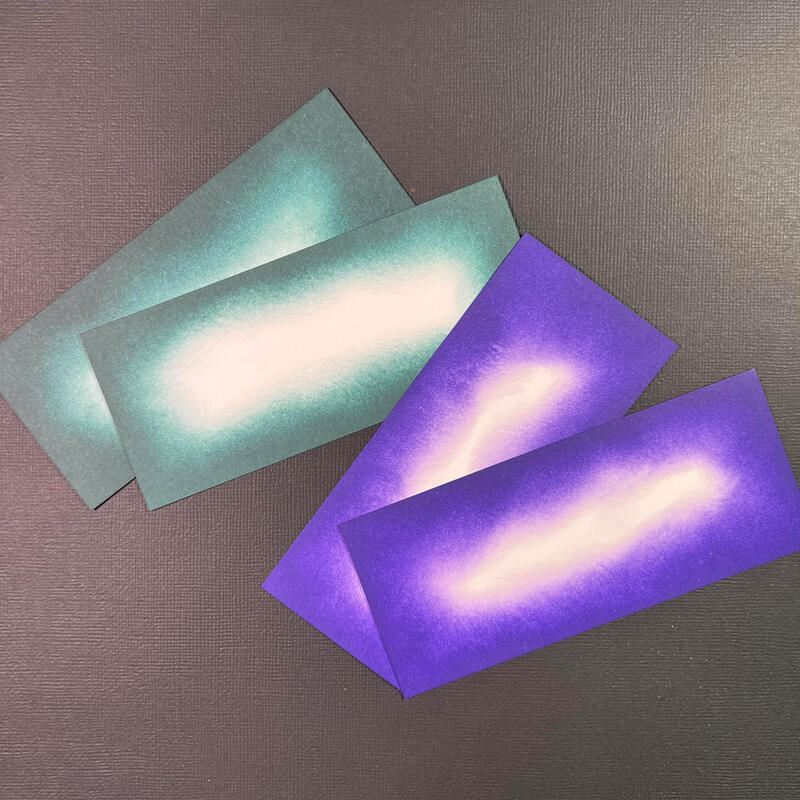
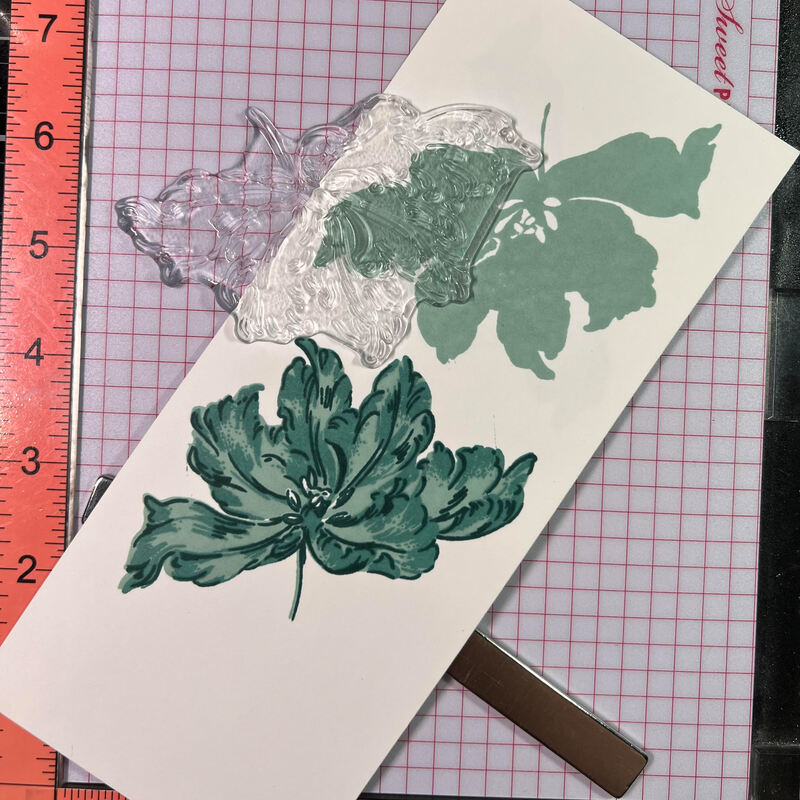
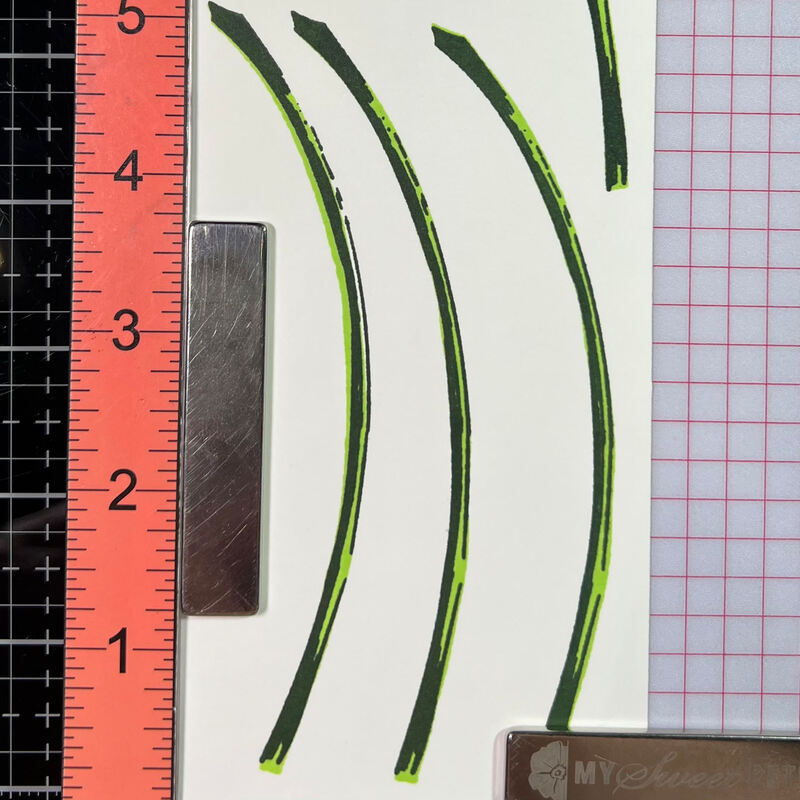
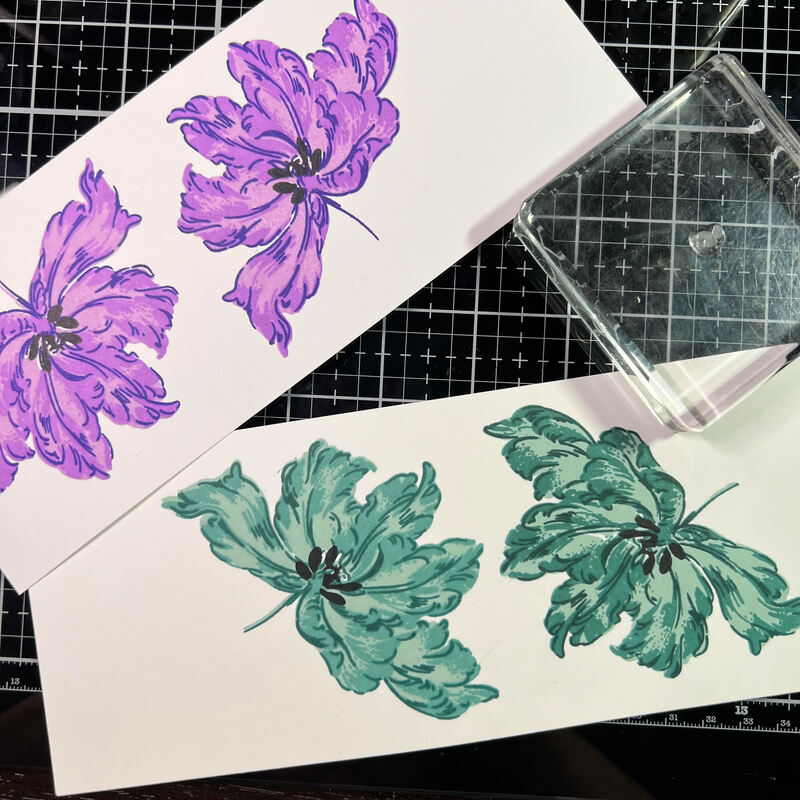
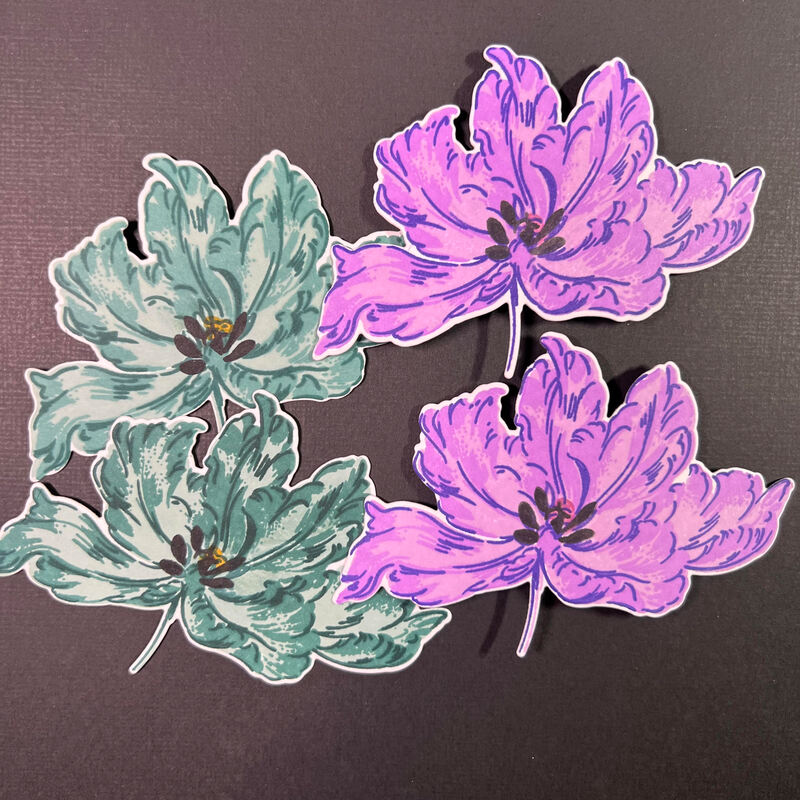
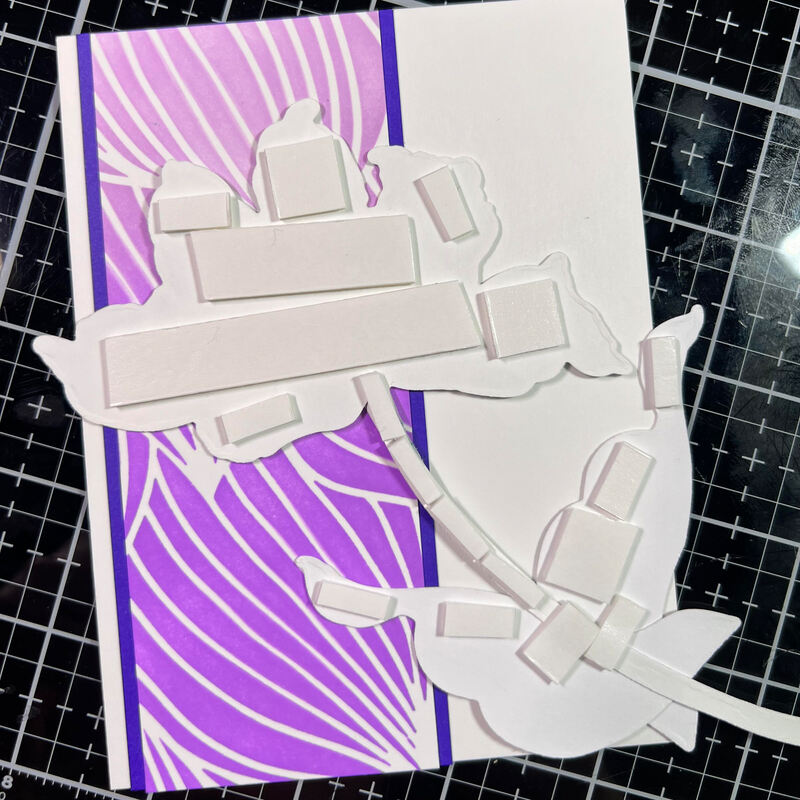
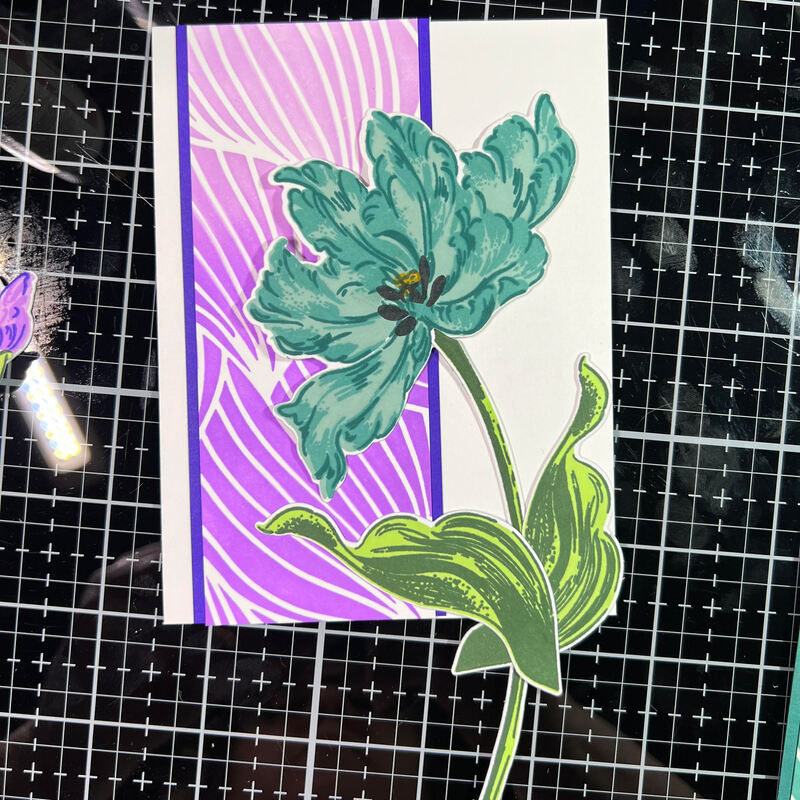
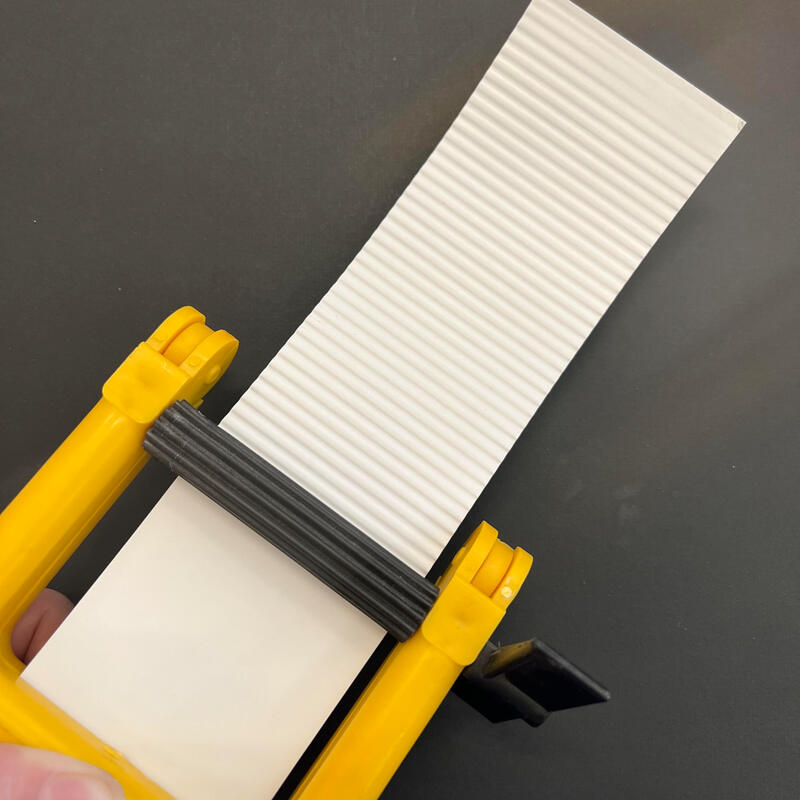
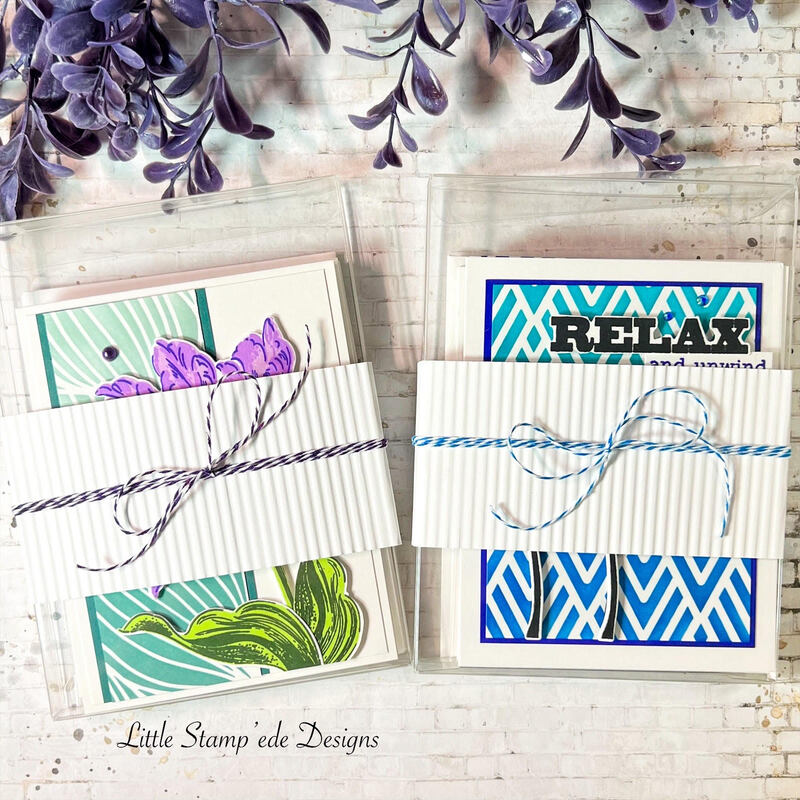
Hello my crafty friends! Today I am here with my final challenge for Altenew's Educator's Certification Program - Level One. My challenge is to create His and Her card sets, using components from 3 classes in Level One and one recycle element. I also needed to design on how I was packaging the sets. I decided to use the following components from the classes and products are pictured below: His Set: Stenciling Ink Blending Die Cutting Her Set: Layering Stamping Die Cutting Stenciling Let's start with the His Set! I love the silhouettes of this stamp set and it looks very masculine to me, so I chose this set. I also love anything tropical and that palm tree was speaking to me! Here is how I created this set: 1. I first inked up the stencil using two different colors so it would have that gradient color flow. I then ink blended cardstock piece to mat the stenciled pieces. I like to ink blend cardstock instead of using colored cardstock so I can achieve any color that I want. I then glued the pieces together. 2. I stamped the images with black ink using my Misti and die cut them out using the coordinating dies. 3. Using the circle die from the coordinating die set, I cut out a circle and ink blending the background and stamped the grass image from the stamp set. 4. I then stamped out the sentiments from the stamp set and fussy cut the bigger sentiment and cut the smaller sentiments into strips. 5. I then glued the stenciled piece onto the card base, then popped the trees/sun/circle onto the card base with foam tape and then popped the sentiments with foam tape. I then added some bling from my stash. I love how these cards turned out! I like how I changed the size of the stenciled pieces and made two portrait and two landscape cards. The blues are beautiful! Now onto the Her Set!! I am in love with the Blooming Tulips stamp set! In fact, I love it so much I accidentally bought it twice not realizing I already bought it a few weeks before! Can anyone relate?! Here is how I created these cards: 1. First, I inked up the stencil using two different colors so it would have that gradient color flow. I then ink blended cardstock piece to mat the stenciled pieces. This is just like I did for the His set, using a different color and stencil. I also decided to use the same size stenciled piece for this set. 2. I then stamped up the floral image, stamping the lighter background first, then the medium color and then the darker outline stamp. I then die cut the tulips out with the coordinating dies. I also stamped out the stems and leaves in the same fashion - lighter color first then the darker color. There are only two layered steps in the stems and leaves. I then cut them out with the coordinating dies. 3. Then glued the stenciled piece onto the card base and then glue the stem/leaves onto the tulip. I then popped up the tulip onto the card base with foam tape. I then took a pair of scissors and cut off the part of the stem that was longer than the card. 4. I then stamped the sentiments onto black cardstock and heat embossed them with white super fine embossing powder and cut them into strips. I used black cardstock because I wanted the sentiment to stand out more and I thought white would get lost in the card. I then popped the sentiment onto the card with foam tape. I then added some bling I had from my stash. I absolutely love this color combo! It is one of my faves and I love the layering stamps! Now you might be wondering how I added the recycled part of the challenge. I decided to add it to my packaging. I took out a package of 12x12 paper and took out the white cardboard backing in the package. I then cut 2 1/2 inch strips and ran the strips through a corrugating tool to create a corrugated strip. I then wrapped it around a clear card box I had and glued where the strip meets. I then took some bakers twine, blue for his and purple for hers, and wrapped it around three times and tied a bow. I was going for a simple look and I love it! That's it! I love how my projects came out and I loved this challenge! It was fun to make card sets with a little difference in each card. It got my creative juices flowing! I hope you enjoyed it and I will see you all soon!
Happy Crafting Y'all! 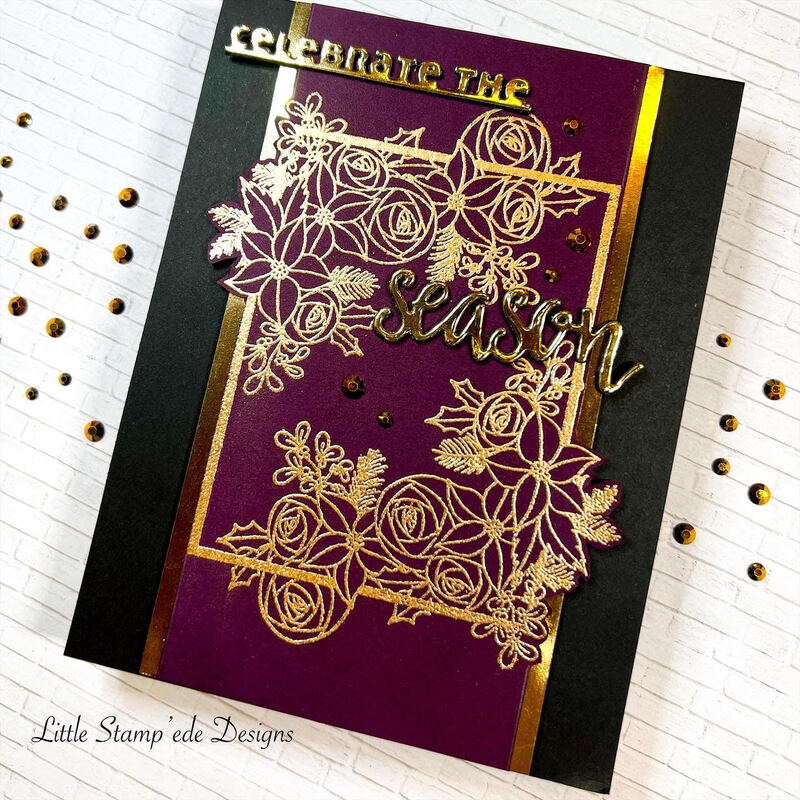 Hey everyone! Today I am sharing a card I made during the holiday season for the Let It Shine class in the Altenew Educator Certfication Program. I really love working with embossing powder and foil paper! I decided to use the Festive Floral Frame set from Altenew which I love so much! First, I embossed the floral image with gold embossing powder on some purplish burgandy cardstock that I had in my stash. I then fussy cut the edges of the image and cut the length the same as the A2 card, which is 5.5 inches. I then glued the image onto a piece of gold foil paper and popped it up on a black card base. Then I cut the sentiment from the Christmas Season die set from Altenew with the gold foil paper and cut the sentiment in black cardstock a couple of times so I could had dimension. I glued the sentiments together and ended the layers with the gold sentiment. I then glued the sentiment onto the card panel and then added some gold bling that I had in my stash to complete the look. I have loved this stamp set for a long time and I love the look of embossing for holiday cards! I hope you have a great day and thanks for stopping by! Happy Crafting Y'all! 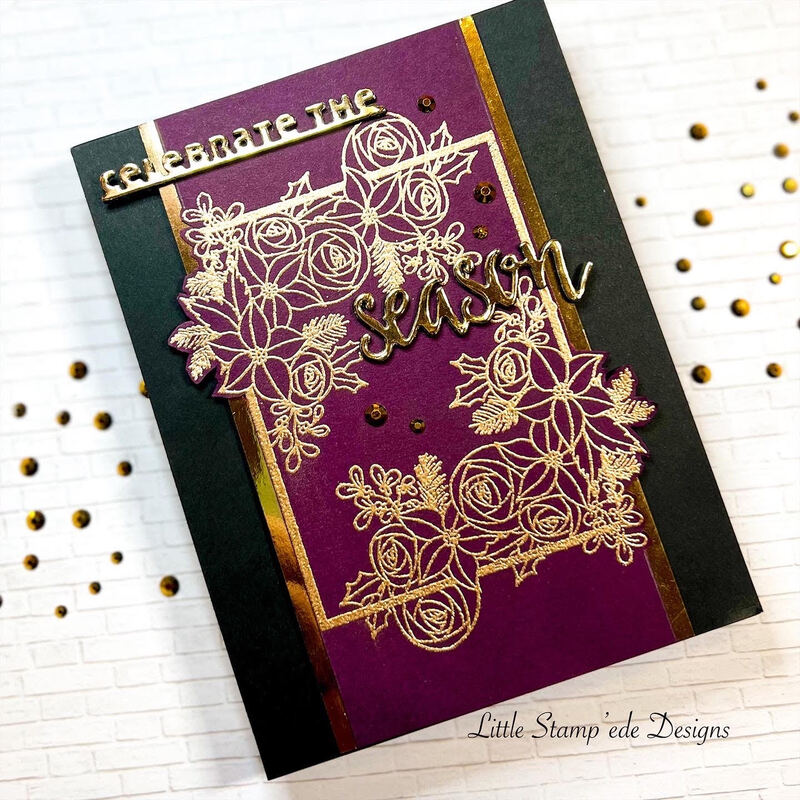 |
Follow Sammi:
AuthorI love to create and invite you to join me in my journey in this crazy paper crafting world we live in! 
Archives
February 2022
Categories |


 RSS Feed
