|
Happy Sunday everyone! I hope you all are having a great weekend! Here in Northern Cali, we are having a heatwave and it has gotten up to 108 degrees today! A great day to stay in the air conditioning!
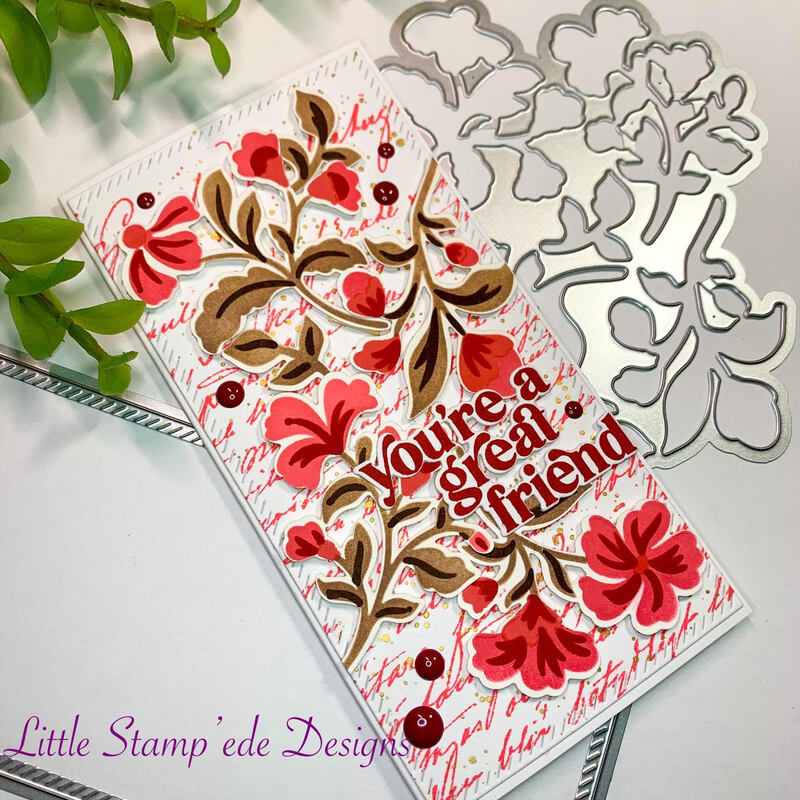
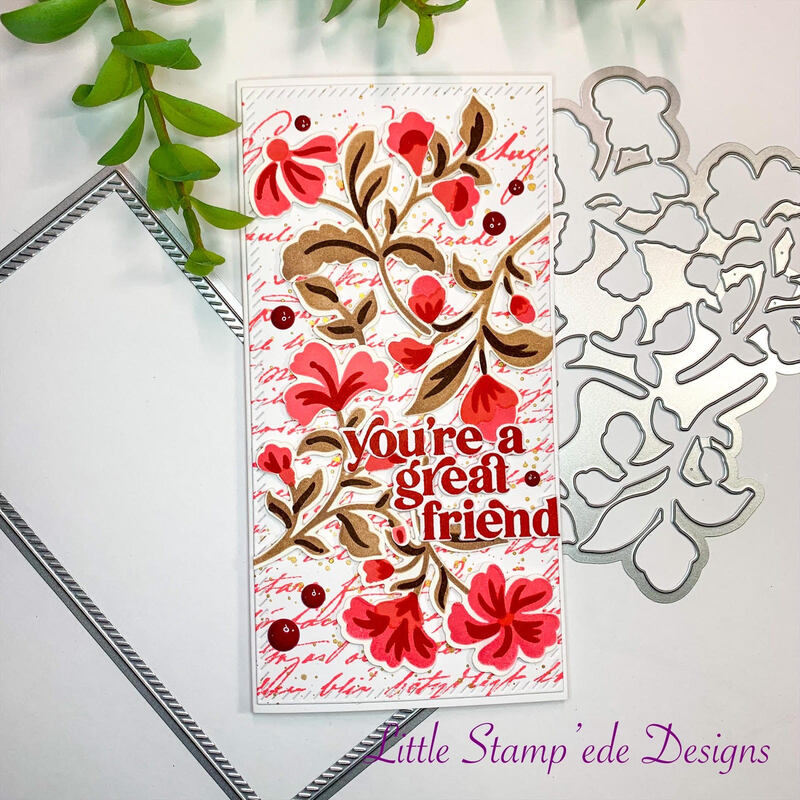
For today's card, I wanted to show a very quick and simple card to make. Pinkfresh Studio's has come out with some great stamp/stencil/die bundles that are so beautiful! I decided to play with the Be Strong bundle and it is so cute! There are 5 stencils with this bundle and they are numbered, so I just layered on the color in the order of the stencils using the colors Icing On The Cake, Over Coffee, Do-Si-Do, Polished and Rouge inks from Catherine Pooler. I then used the coordinating die to cut them out. I then used one of the mini slimline dies from Pinkfresh's Mini Slimline bundle. I then grabbed the Old Letter 1878 background stamp from Simon Says Stamp and inked it up with Coral Cabana ink from Catherine Pooler and then added some splatter using Nuvo Mica Spray. I then rearranged the flowers the way I wanted them on the card panel, then laid down Press N Seal on top to keep them on the order I wanted them. I then added some foam tape and laid them back on top of the card panel. I then glued the card panel on top of the card base using Bearly Art glue. I then stamped sentiments using the Perfect Sentiments from Pinkfresh and cut them out with the coordinating die. I then popped it up with foam tape and Bearly Art glue. I then added some enamel dots I had from Gina Marie Designs. I love how it turned out and it was a quick and simple card to make. I hope you all are staying cool and see you all in a few days! Happy Crafting Y'all! Hey everyone!! I am excited to be a Guest Designer for Trinity Stamps 3rd Birthday New Release! We are having IG Hop so I hope you all will come hop with us!
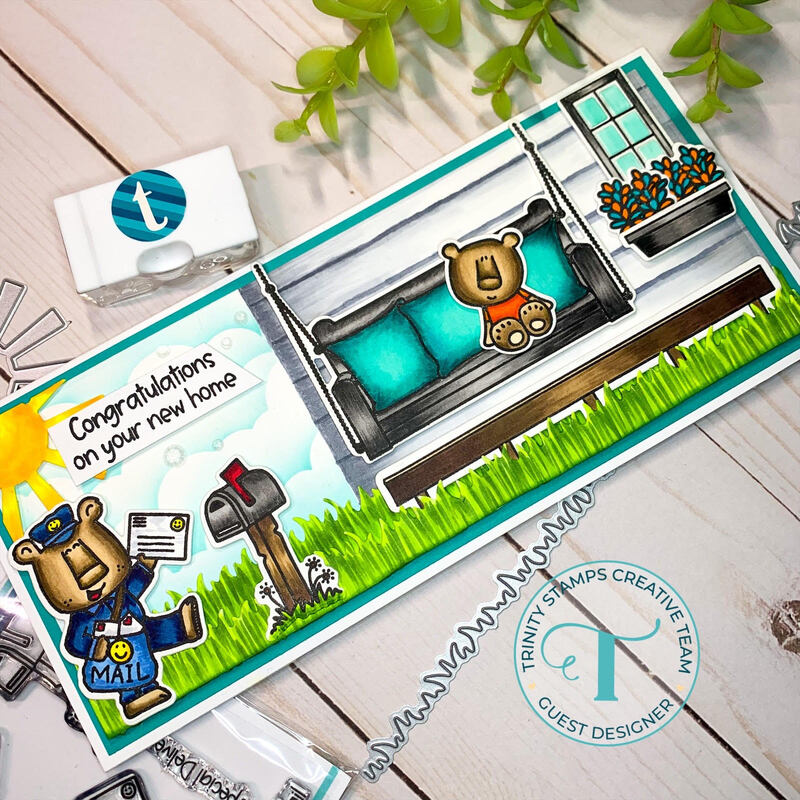
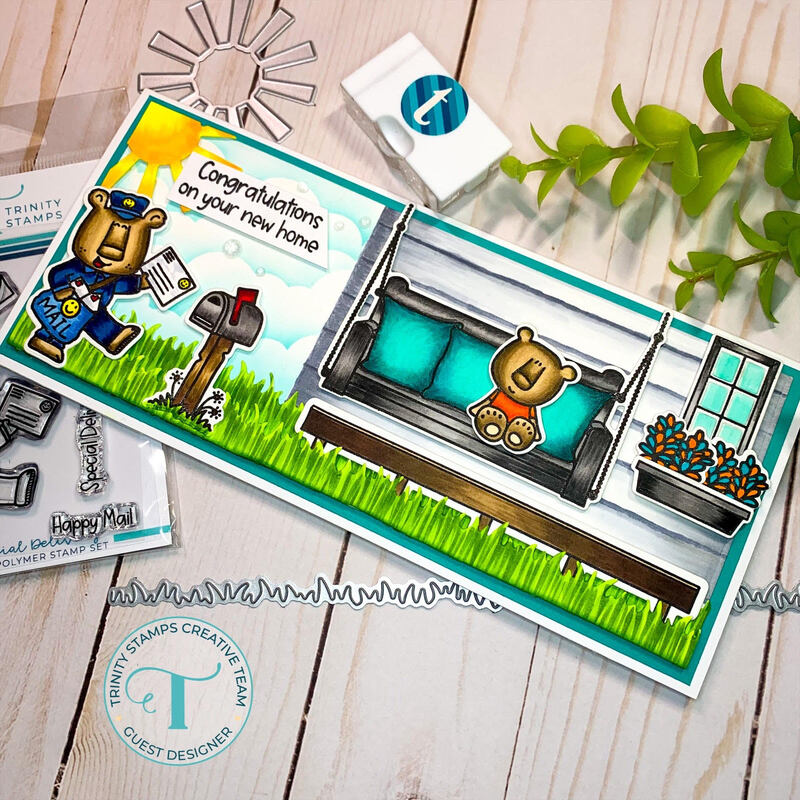
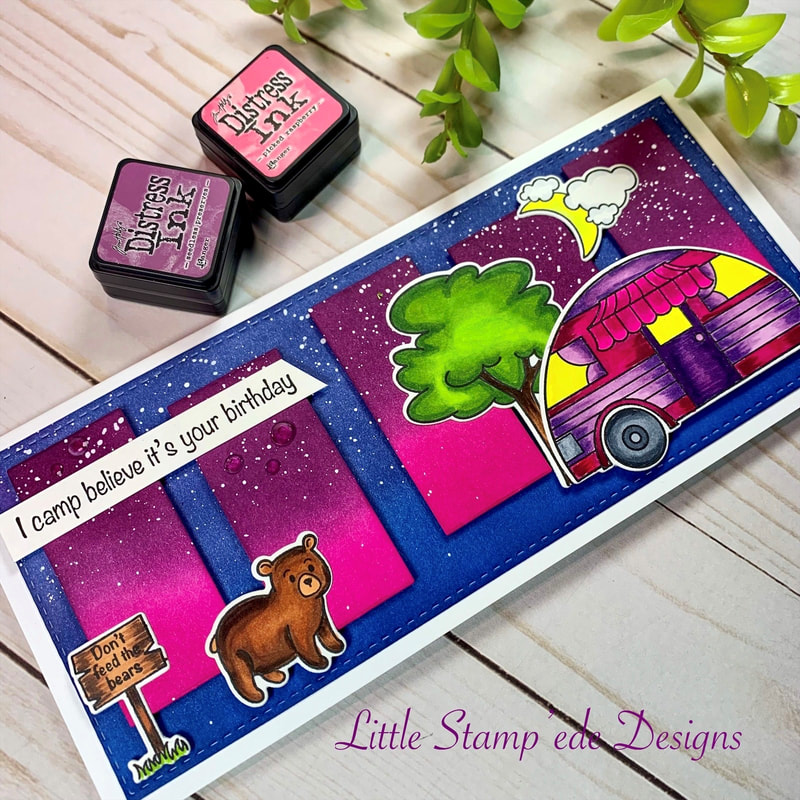
For my project, I highlighted the Special Delivery and Cozy Cottage Porch stamp sets and dies from the new release! I also used the Rainbow Funshine Die set, The Great Outdoors Border and Builders Die set and the Puffy Cloud Layers stencil from Trinity to help complete this scene! I used Copic markers to color the images and the colors I used are B39, B37, B34, B23, B21, BG78, BG45, BG34, BG23, BG11, E87, E47, E44, E43, E42, E41, YR18, YR16, YR07, YG67, YG25, YG01, Y19, Y08, Y06, C5, C4, C3, C1, T8, T7, T6, R39, and R29. I stamped each image with Hero Arts Intense Black ink and cut them out with the coordinating dies and colored them. I used Salvaged Patina Distress Oxide ink for the cloudy sky. I hand drew the house background using the C and T's gray colors. After I colored everything, I put the scene together using a combination of foam tape and Bearly Art glue. The sentiment is from the Cozy Cottage Porch stamp set. I then used some Trinity Crystal Clear Embellishments to add some sparkle. I love how this scene came out! Come hop with us for a chance to win a $25 gift certificate to Trinity Stamps! See you all later this weekend! Happy Crafting Y'all!! Hello everyone! So...I found a new stamp company, Pawsome Stamps! For those that know me know that I live near Happy Camp, CA and work in Happy Camp, and this stamp set is called Happy Camper, so of course I had to get it!
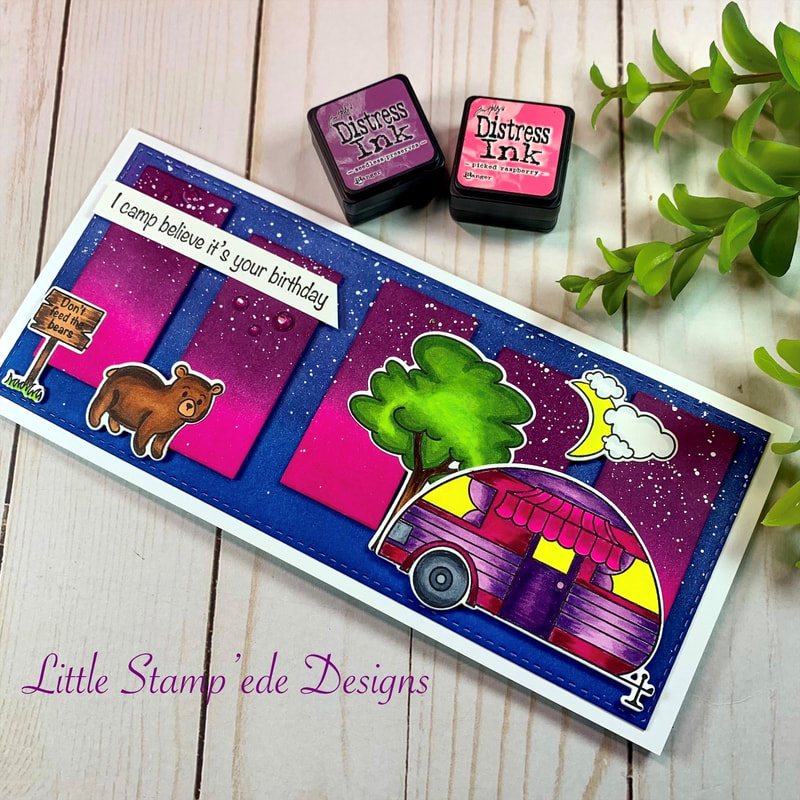
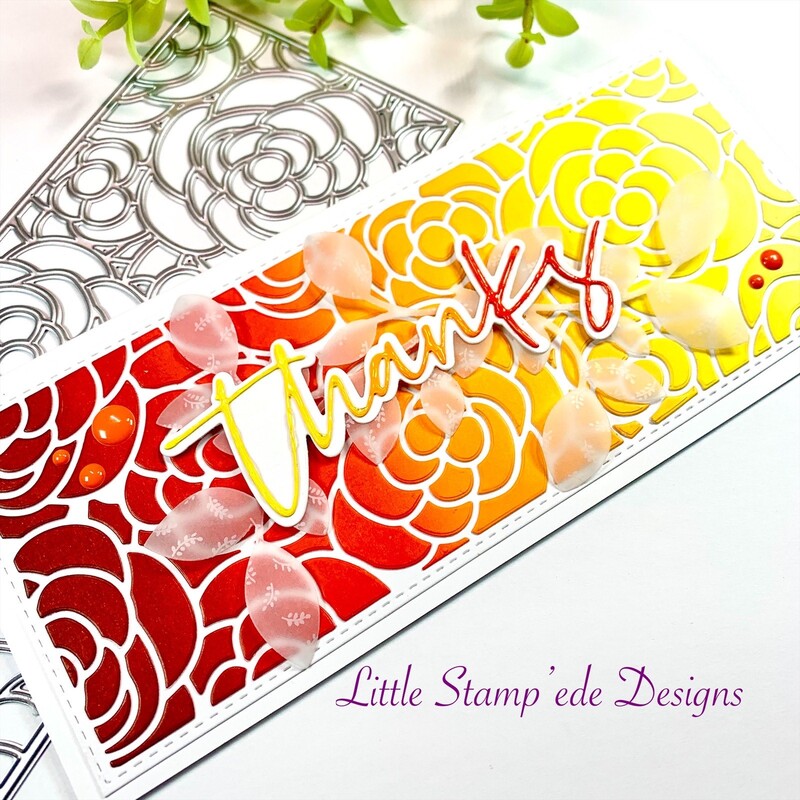
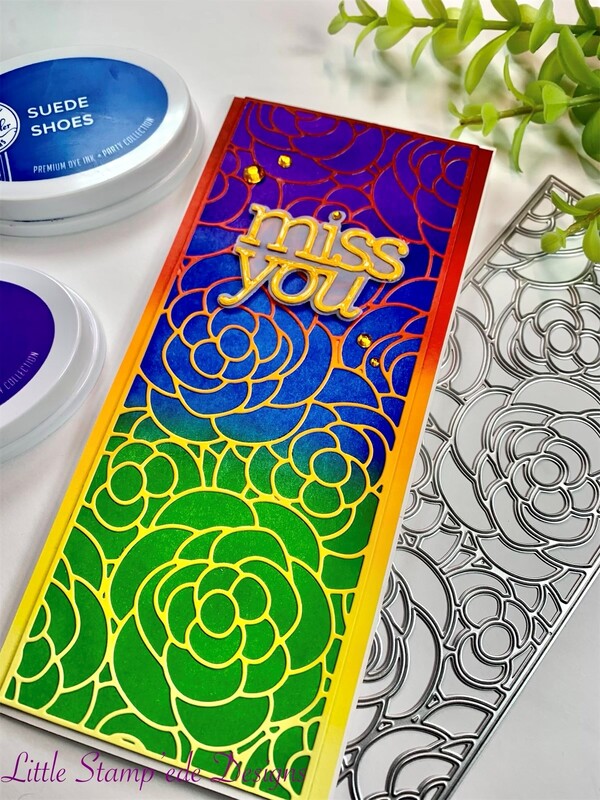
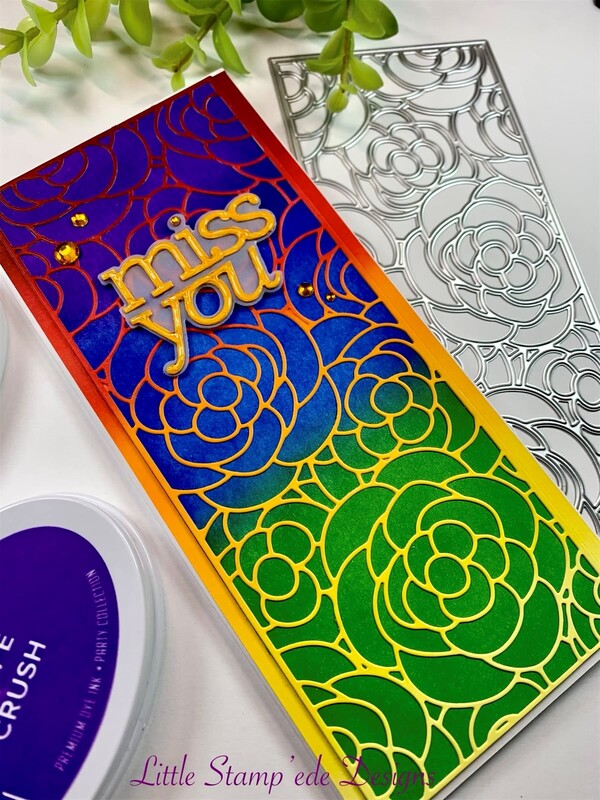
For this project I used the Slimline Staggered Rectangle die from Trinity Stamps, and did some ink blending using Chipped Shapphire, Seedless Preserves and Picked Raspberry Distress Ink from Tim Holtz. I stamped the images with Hero Arts Intense Black ink and colored with Copic colors YG67, YG63, YG25, YG13, YG01, E79, E27, E25, E15, E13, C7, C6, C5, C3, Y06, Y02, Y00, RV69, RV19, RV17, RV14, RV09, RV04, V17, V15 and V09. I popped the rectangles with foam tape and used Dr. Martin's Bleed Proof White to splatter the starry night. I then used Bearly Art Glue to glue down the images and sentiment and used some bling from Trinity Stamps. I love how this turned out. I will definitely use this stamp set again! I hope you all have a great day and I will see you all tomorrow for the Trinity Stamp New release IG Hop!! Happy Crafting Y'all!! Hey everyone! When I first seen the Slim Rose Bloom die from Scrapbook.com, I knew that I had to have it! It is so beautiful!! And what is better than being able to make two cards with one die! Here you will see two very different cards using the positive and the negatives from the die.
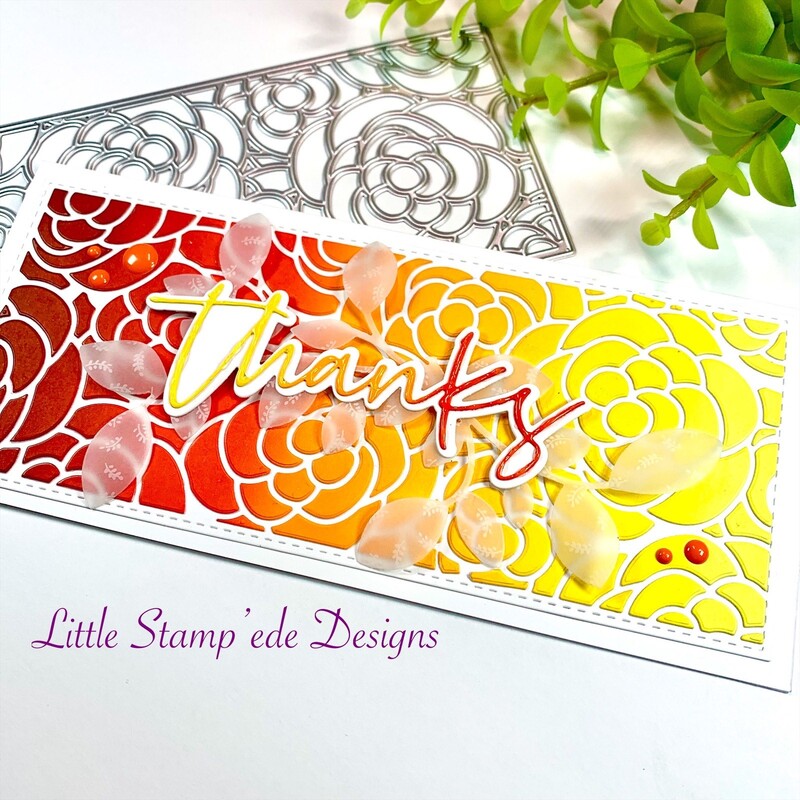
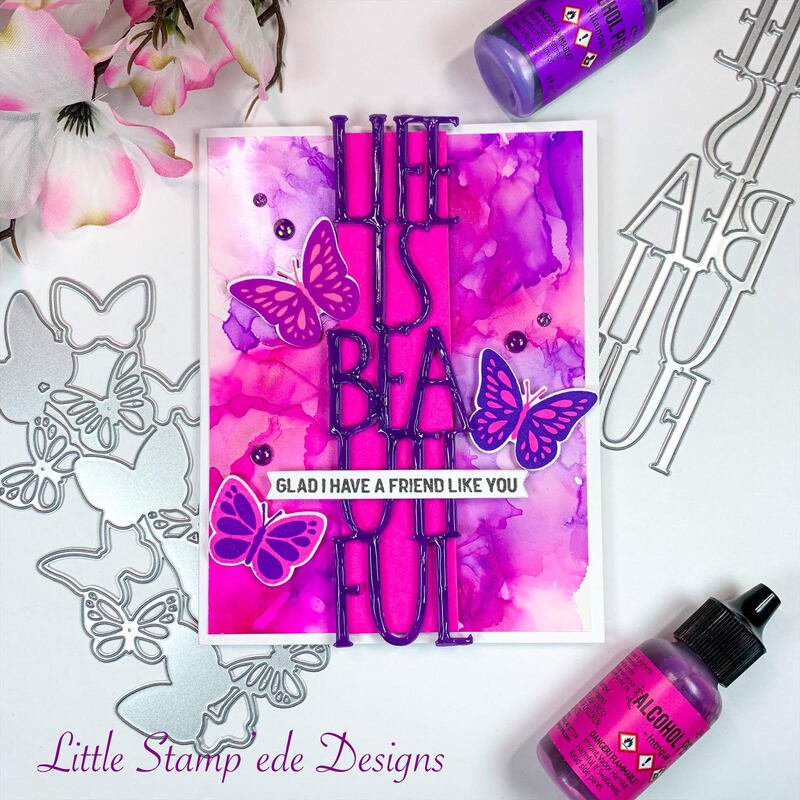
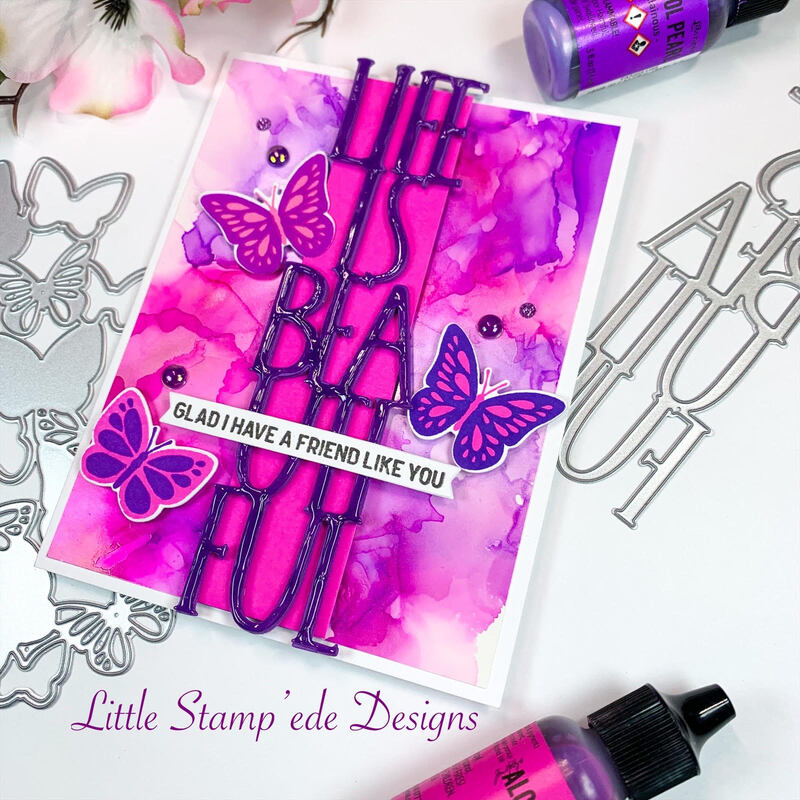
I first did some ink blending using Cranberry Fizz, Rockin' Red, Samba, Tiki Torch, Catching Rays, Limoncello and Chiffon inks from Catherine Pooler. I then die cut the rose image with the Slim Rose Bloom die. Using the negatives pieces, I carefully pieced it together using the die has my puzzle guide and glued them onto the card panel using Bearly Art Glue. The great thing about this glue is that it has a little wiggle room before it sets which helps a lot in this process! I then cut out the sentiment using Brutus Monroe's Christopher's Sentiments and added some Glossy Accents to add some shine. I then cut out some Cluster Leaves from Simon Says Stamps out of vellum. The vellum had some cut leaf designs on it that adds that extra pizazz! I popped the sentiment with foam tape and glued the leaves with Bearly Art glue under the sentiment. For the other card, I used the positive piece and did some ink blending for the background using Grape Crush, Suede Shoes, and Grass Skirt to make a rainbow looking card. The sentiment is the Miss You dies from Simon Says Stamp and I added some Glossy Accents to add some shine. Both cards have some bling that I had in my stash. This die is a must have! I love it!! I hope you all have a great week and I will see you in a few days!! Happy Crafting Y'all!! Happy Saturday everyone!! What are you all up to this weekend? Here in Northern Cali, it is 106 degrees, so I am going to stay indoors and clean some house and of course craft! For today's card, I played around with the new release from Concord & 9th Bold Butterflies, Butterfly Perfect Pairing dies and some alcohol inks. What fun!
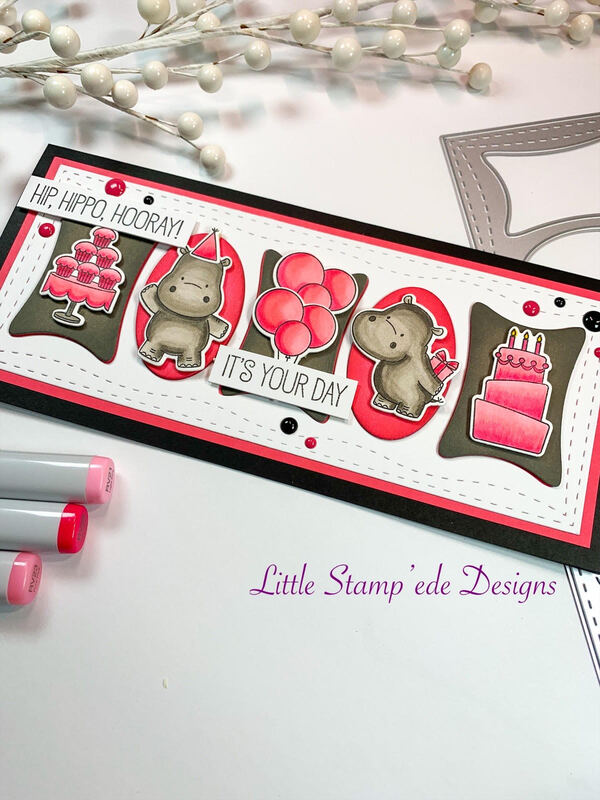
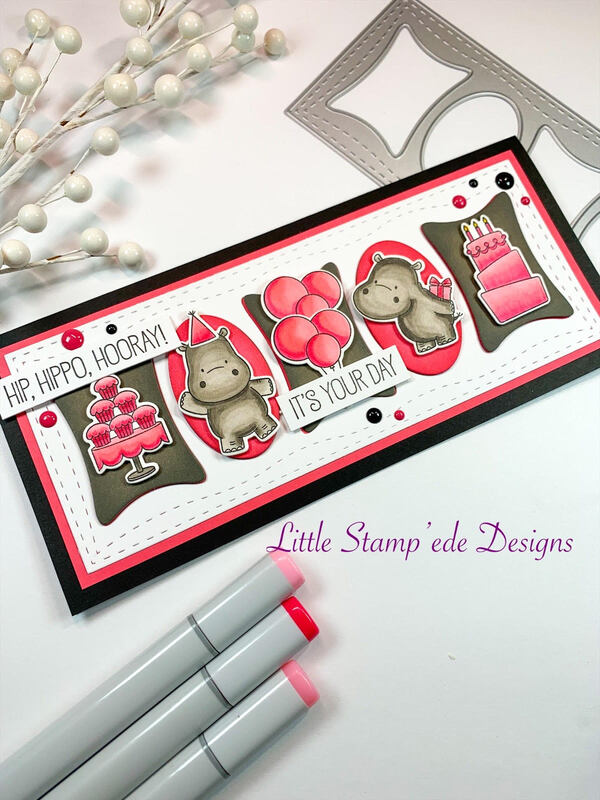
I made the alcohol ink background with Tim Holtz's Pearl inks Intrigue and Villanous...what a beauty! I then cut the Life Is Beautiful die and used Grape Crush ink from Catherine Pooler to color and then used Glossy Accents to make it shiny and then cut another image with fun foam to make the sentiment die pop. While that was drying, I stamped the butterfly images from the Bold Butterfly stamp set using Pucker Up, Be Mine, Grape Crush and Flirty Fushia inks from Catherine Pooler. I then cut a piece of cardstock to go down the middle of the card and inked it with Pucker Up ink. I then glued it onto the card panel using Bearly Art glue and then popped the sentiment die on top after I glued it onto the image cut in fun foam. I then popped the butterflies using foam tape. I then stamped the sentiment and used the die that came with the Butterfly Perfect Pairing dies to cut the sentiment out and popped it over the glossy sentiment. I then glued the card panel onto a 110lb white card base and added some bling I had from Queen & Co. It came out great! I hope you all like it and have a great weekend! See you all in a couple of days! Happy Crafting Y'all! Hey everyone! I hope your week is going great and you are getting some crafting in! Today I am showcasing the Happy Hippos stamp set from My Favorite Things and I have to say - these hippos are so darn cute! I love them! I used the Slimline Pillows Die from Whimsy Stamps for this card which is perfect to set the scene! I used Party Dress, Do-Si-Do, Black Jack, Twilight and Sand Castle inks from Catherine Pooler for the negative spaces of the slimline die.
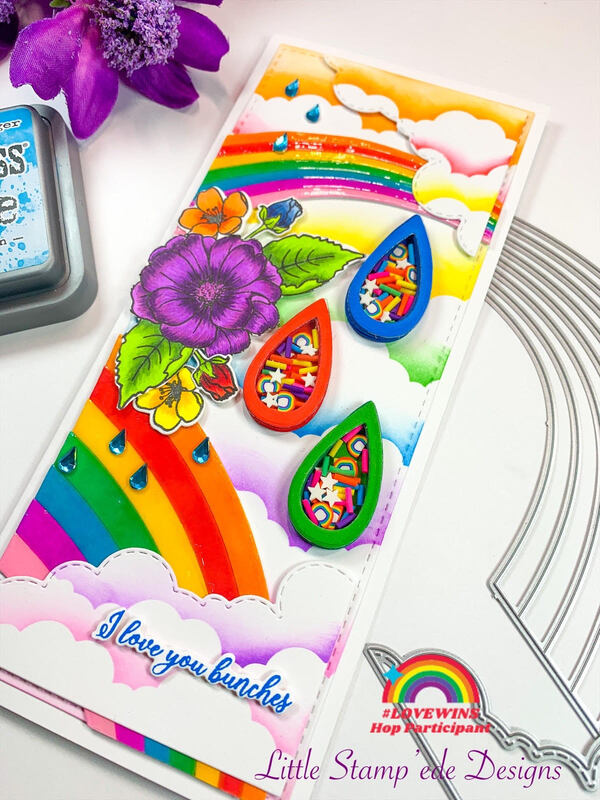
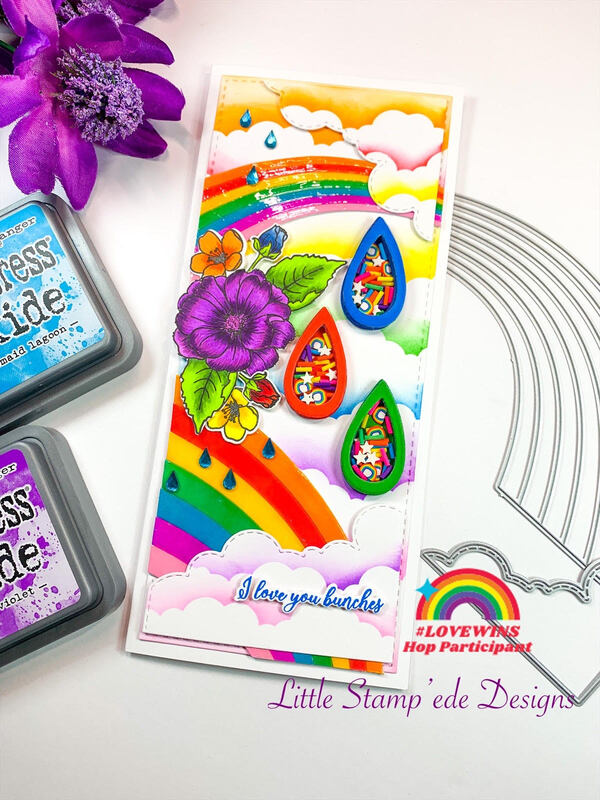
I then stamped the cakes and hippos with Hero Arts Intense Black ink and cut them out with the coordinating dies and then colored them with COPIC colors RV29, RV25, RV23, RV21, W7, W5, W3 and W1.I then popped them onto the negative spaces with foam tape and then popped the negative spaces in their spots with foam tape. I then stamped the sentiment and popped it with foam tape. I then glued the card panel onto a pink card panel using Bearly Art glue and then glued it onto a 110lb black card base. I then finished the card with some bling from Queen & Co that I had in my stash. I love how this card came out! I hope you all have a great rest of the week and I will see you this weekend! Happy Crafting Y'all! Happy Monday everyone!! On Saturday, the Love Wins Instagram Hop began to celebrate Pride Month and it lasts until June 17th! I am on Team Yellow and today is our day to celebrate! I am so exited to be participating in this hop and it means so much to me! I hope you will go hop along with us! There are SO MANY prizes!!
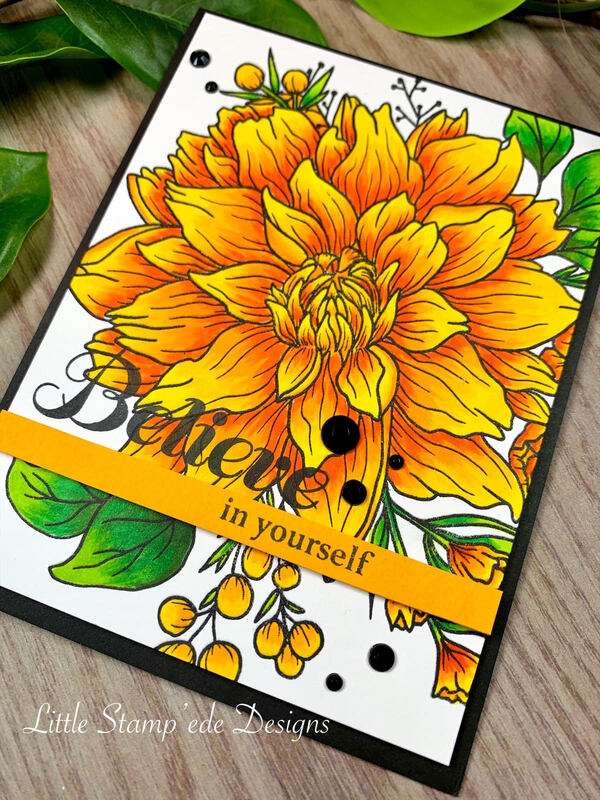
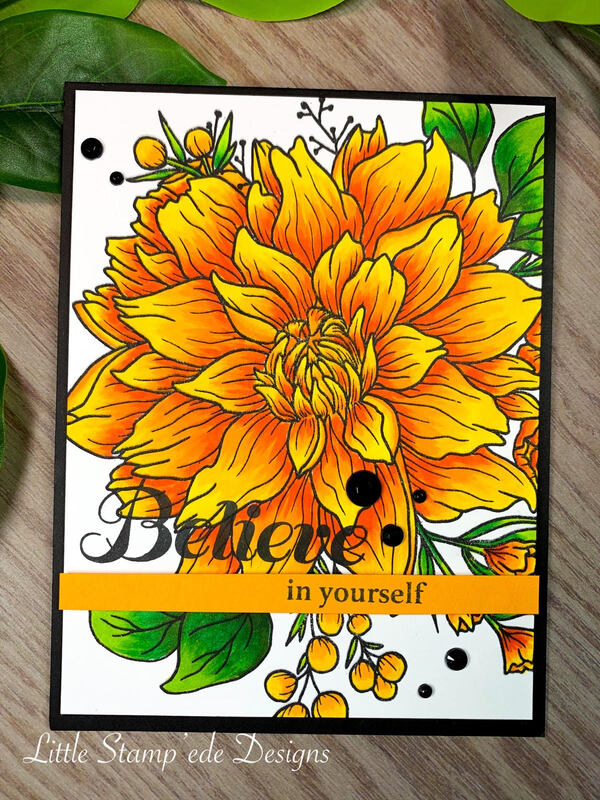
For this card, I used the Rainbow Builder from the Slimline Series from Trinity Stamps along with the Cloud stencil and Love You Bunches stamp set and die. First I cut out the rainbow and corner clouds with the Rainbow Builder dies and colored the rainbow using blending brushes and Distress Oxide colors Wilted Violet, Mermaid Lagoon, Lucky Clover, Mustard Seed, Kitsch Flamingo, Festive Berries and Spiced Marmalade. I then added some Glossy Accents to add that extra shine. Using the cloud stencil, I made colorful clouds for the background using the same colors and added some cloud color the the corner clouds cut out from the Rainbow Builder. I then stamped the Love You bunches floral image with Hero Arts Intense Black ink and fussy cut out the main floral image and then stamped the smaller flower images and die cut them out with the coordinating dies. I then colored them with Copic colors Y19, Y06, Y02, YR09, YR04, YR02, YG67, YG25, YG01, B39, B37, B34, B21, R59, R46, R24, V09, V06 and V04. I then used some rain drop dies from Catherine Pooler and made shaker rain drops using some Rainbow Shaker Mix from Paper Rose. This card came together beautifully! I know it has a lot going on, but that is what I wanted! I love it! I used Bearly Art glue to glue it all together and popped it onto a 110lb white card base. I hope you all hop along with us on Instagram for your chance to wine some GREAT prizes! See you all later this week! Happy Crafting Y'all! Hey everyone!! I hope you all are having a great weekend! For today's card, I played with the stamp set from Crafty Meraki called Believe In Miracles, illustrated by Emily Midgett. I just love her illustations! They are so beautiful!!
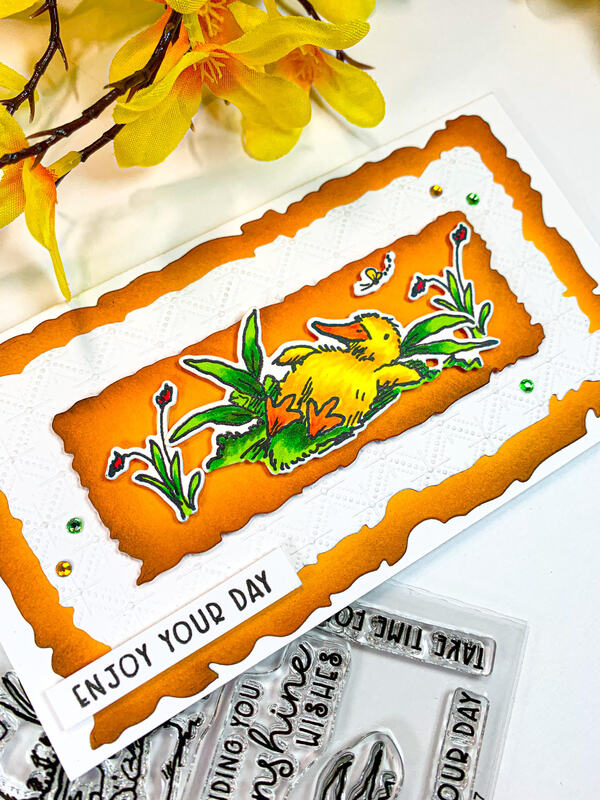
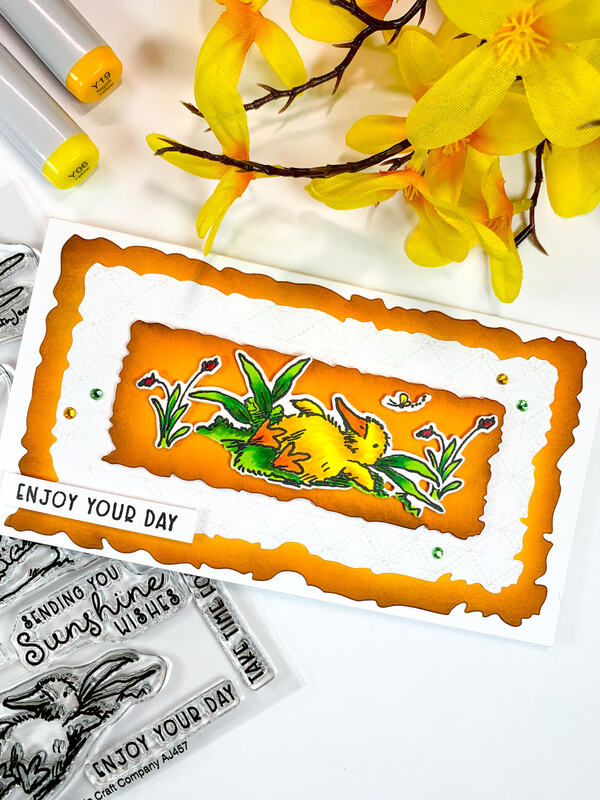
First, I stamped the image with Hero Arts Intense Black ink and then colored it with Copic Markers YR09, YR16, Y17, Y15, YG67, YG03, and G07. I then stamped the sentiment with the same black ink and then popped it up on a prepared black 110lb card base with foam tape and added some black bling that I had in my stash. I love how bright this came out! I hope you all have a great weekend and I will see you all on Monday when I am on the Love Wins IG hop! Come check it out! Hey everyone!! The moment I seen that little duck in the Pond Pampering stamp set from Colorado Craft Company, I knew I just had to have it! I love this duck so much! Isn't he just the cutest!!
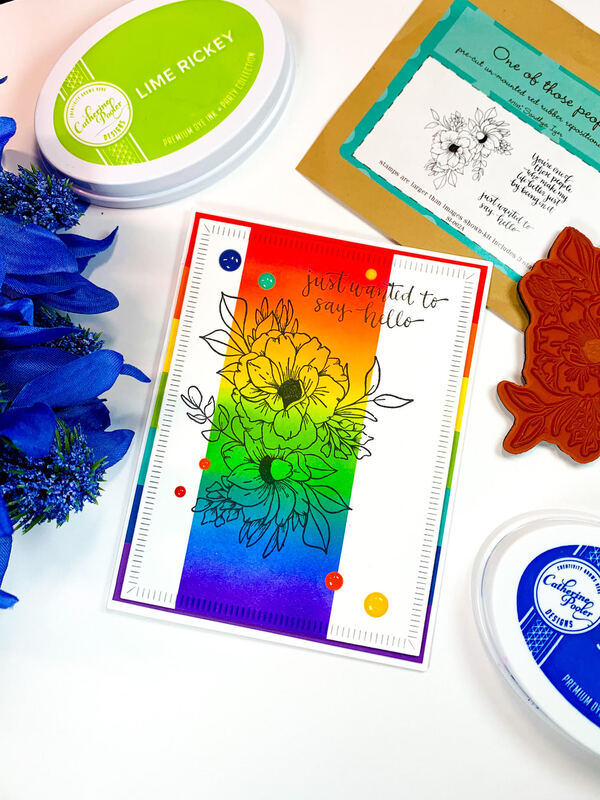
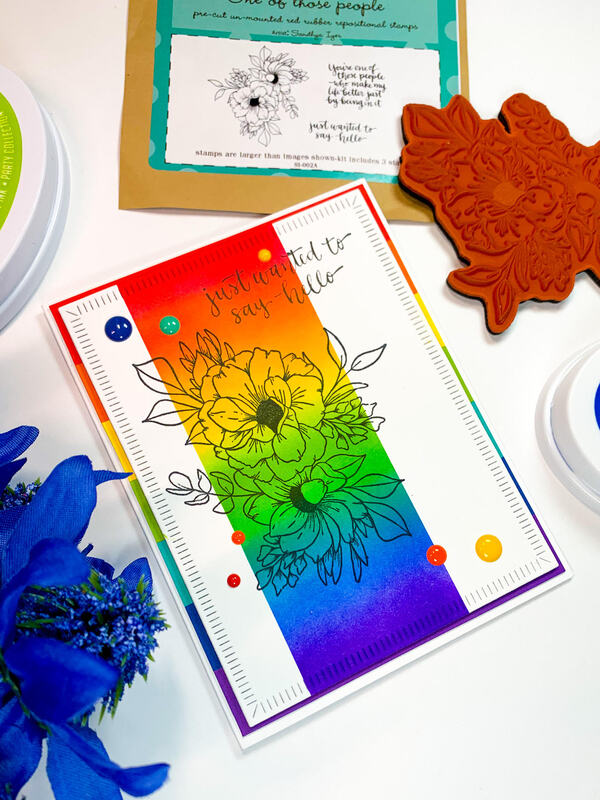
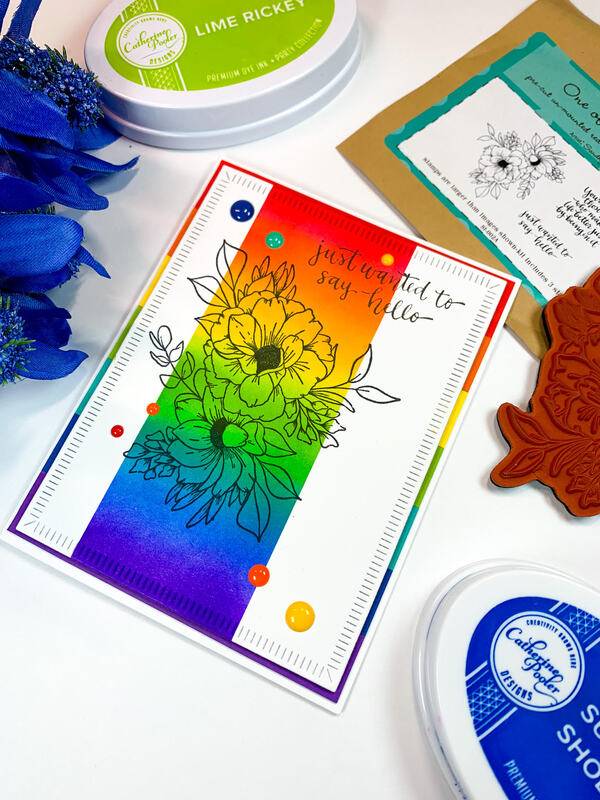
I have been wanting to make a mini slimline card, so I decided to make one with this little guy. I first cut out three different layers using the deckled mini slimline dies from Kat Scrappiness. I then ink blended the bigger and smaller layer with Catching Rays ink from Catherine Pooler. I then edged the layers with Sauna and Icing on the Cake inks to create a distressed look. I then took the middle layer and embossed it with the Dainty Diamonds embossing folder from Stampin Up. I then inked up the duck, two flowers and the butterfly using Hero Arts Intense Ink and cut them out with the coordinating dies. I then colored them using COPIC colors YR23, Y18, Y08, Y04, YR07, YR04, YG67, YG03, G07 and R46. I then glued the layers together using Bearly Art glue and popped the duck, the flowers and the butterfly using foam tape. I then glued the card panel onto a 110lb white card base. I finished the card with some crystal bling I bought on Amazon. I really like how this card came out and I LOVE this ducky! I hope you all have a great rest of the week and I will see you all this weekend with another creation! Happy Crafting Y'all! Hey everyone!! It is Tuesday, and it has already been a long week! LOL! As most of you know, I LOVE to color with my COPIC markers. When using COPIC markers, you must use a special kind of paper so that the colors will blend and react the way you want them to react. Well....I had stamped this beautiful floral image from the One of Those People stamp set from Unity Stamp Co with the intent to color it with COPIC markers, come to realize after I stamped the image, I stamped it on the wrong kind of paper! So, after I realized that, I put the card panel into my "I will deal with it later" pile and re-stamped it on the "right" paper. Move forward a couple of months, I went to my "I will deal with it later" pile and decided to make something of my mistake. After some thought, I decided to make a rainbow card by ink blending.
Since the image was already stamped with black Memento ink, I then used some Mint Tape from Scrapbook.com and taped the section I wanted to ink blend so I would have a nice clean line on both sides. I then did some ink blending using the colors Rockin' Red, Orange Twist, Tiara, Lime Rickey, All That Jazz, Suede Shoes and Grape Crush inks from Catherine Pooler. I added a lot of ink so that the colors would pop! I then used a die from the Greetery to add some dimension to my card panel. I wanted to mat the card panel with some color, so I got some colored cardstock in my scraps pile and cut them in strips and glued them together to make a rainbow background using Bearly Art glue. I then popped the card panel onto a 110lb white card base using foam tape. I love a nice clean, bright card and this delivered! I hope you all have a great week and I will see you all in a few days! Happy Crafting Y'all!! |
Follow Sammi:AuthorI love to create and invite you to join me in my journey in this crazy paper crafting world we live in! Archives
February 2022
Categories |



 RSS Feed
