|
Hello again! I am back with a project for the Irresistable Inking Techniques class for the Altenew Educator Certification Program. The are so many inking techniques out there! To start with, applying ink to Altenew's laying stamps is a technique, which Altenew has AMAZING layering stamps! Getting that right color combination is key! With this project, I will use a few different inking techniques that are quick and easy to do!
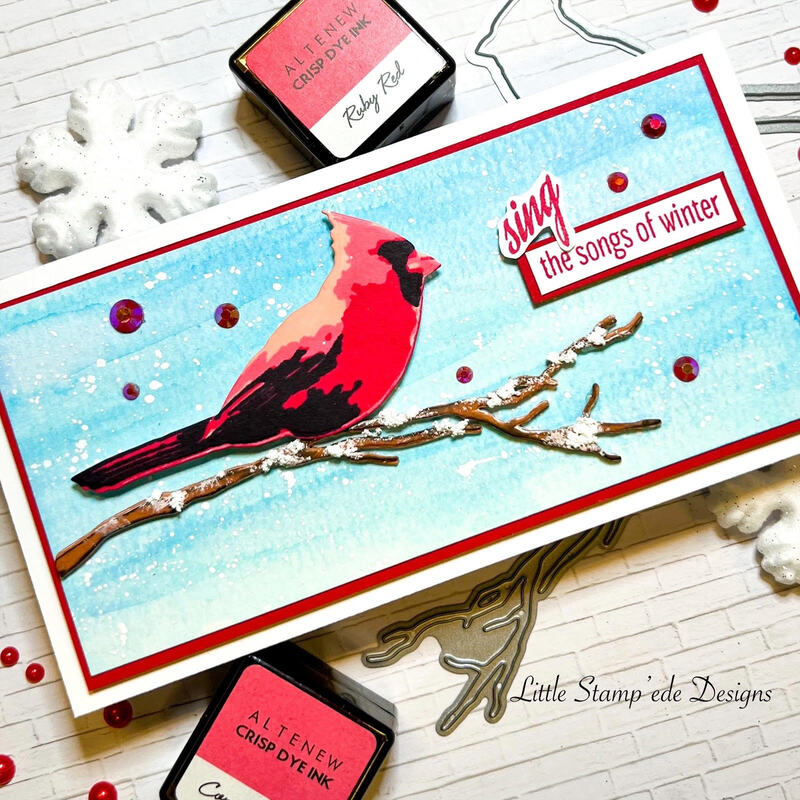
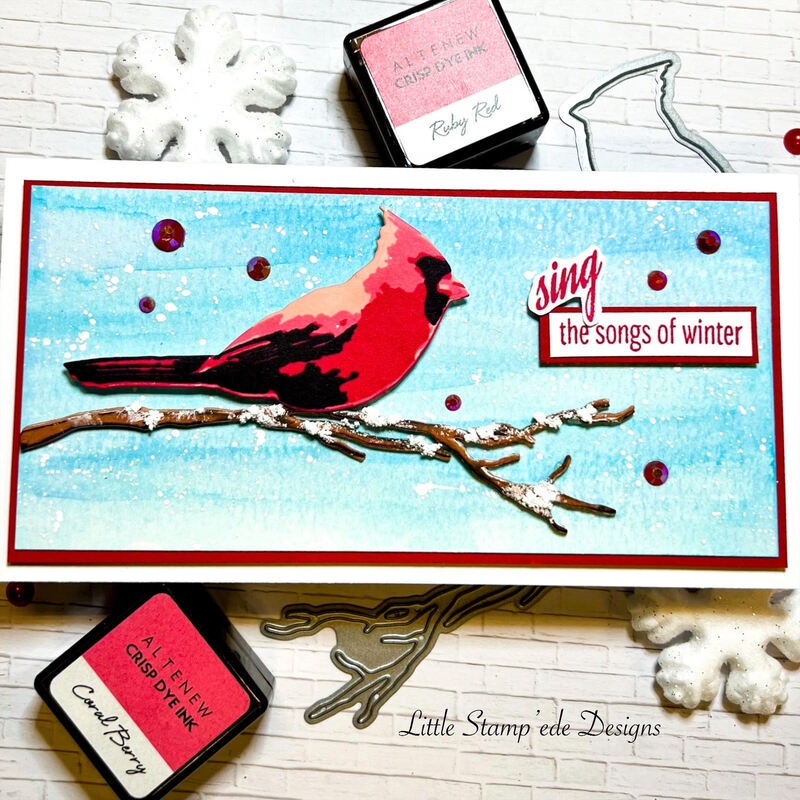
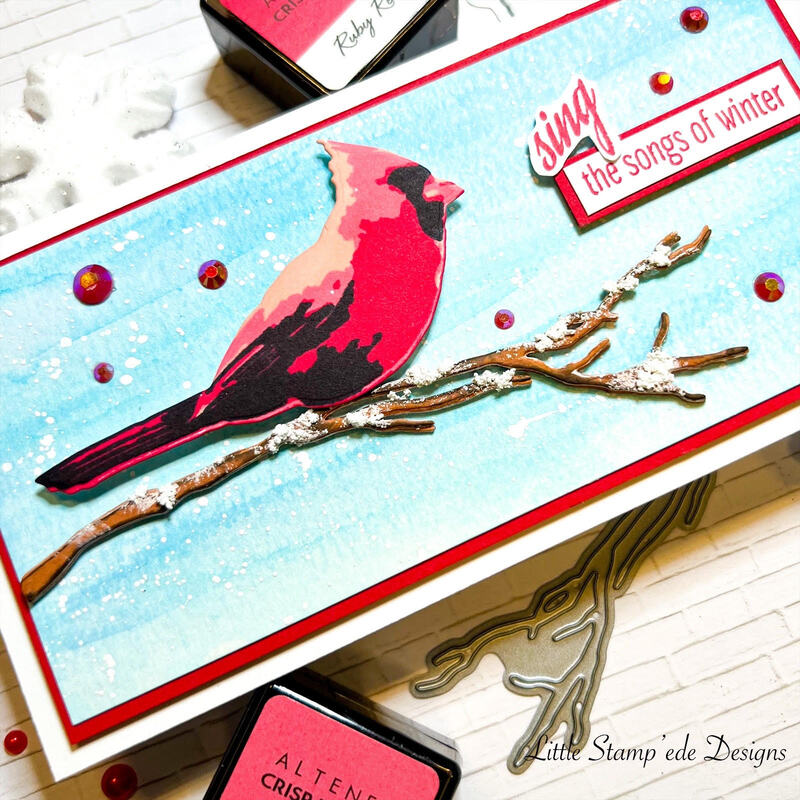
I love the Winter Cardinal stamp and die set so I wanted to use it for this class. It gives me to chance to show a few different techniques and get a beautiful card! As soon as I seen this stamp, I knew I wanted to use it for this class. So the first thing I did was pick my colors for the cardinal. I usually take the ink pads of colors I am looking at and add a little color onto a scrap piece of cardstock until I see colors I like together. For my cardinal I went with Frosty Pink, Coral Berry, Ruby Red, and Jet Black inks, and I used them in that order. After my cardinal was inked up, I cut him out with the coordinating die. I then cut the tree branch out with 110lb cardstock four times, and them inked them with Altenew Paper Bag ink. I then glued them on top of each other. Taking a dark Distress Ink pad, I then applied dark brown ink on the edges of the branch directly from the edge of the ink pad to add some contrast. I then added some Snow Tek to the branch in random areas so the branch looked like it had snow on it. I then cut out a piece of watercolor paper and cut it to the size of 2.75"x5.75". I then took a couple of Distress Ink blue ink pads and added the ink onto my glass mat and added some water. I took a water brush and colored the watercolor paper piece with the watered down blue inks until I got the color I wanted. I used two different colors of blue so the background would have some contrast. I let the watercolor paper dry because it was wet with all the water. After it was dry, I splattered some white ink to make it look like a snowy sky and I glued the watercolor paper panel onto a red cardstock mat. While that was drying, I stamped the sentiment that came with the Winter Cardinal stamp set in Ruby Red ink and cut it out into a strip. I then added a red cardstock mat behind the sentiment strip. I also stamped the "Sing" word in Ruby Red ink and fussy cut the word out. Now it was time to put my card together, so I popped the branch up onto the snowy sky with some foam tape and then I popped the cardinal on the branch using foam tape. I then popped the sentiment with foam tape and added some red jewel embellishments to compete the look. Final step is to glue the card panel onto a 110lb white mini slimline card base. I really like how this card came out. My cardinal looks like he is perched on a snowy branch on a snowy day! I hope you like it! See you all soon with another project! Happy Crafting Y'all!! Hello! I am back with another project for the Altenew Educator Certification Program and the class is Easy Ink Blending Techniques. For this card, I wanted to showcase ink blending a few different ways. When you apply ink with stencils, you are ink blending your ink. For this project, I also wanted to ink blend the background, so I needed to use the emboss resist technique as well. I live in the mountains, so I gravitate to all woodsy stamps, dies and stencils and I love the Classic Pine layering stencil from Altnew! It is perfect for anyone that loves the outdoors!
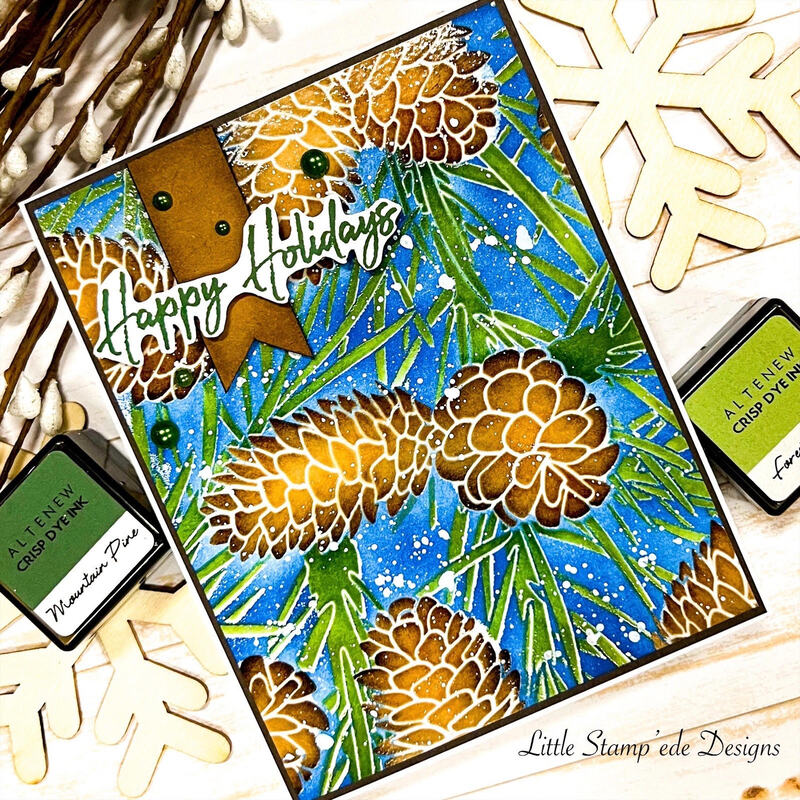
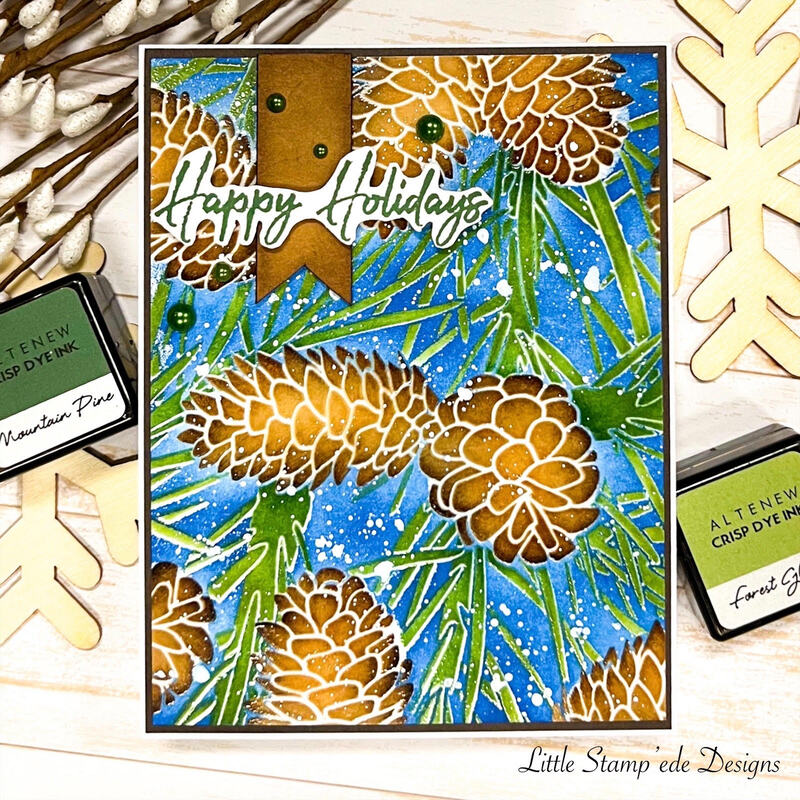
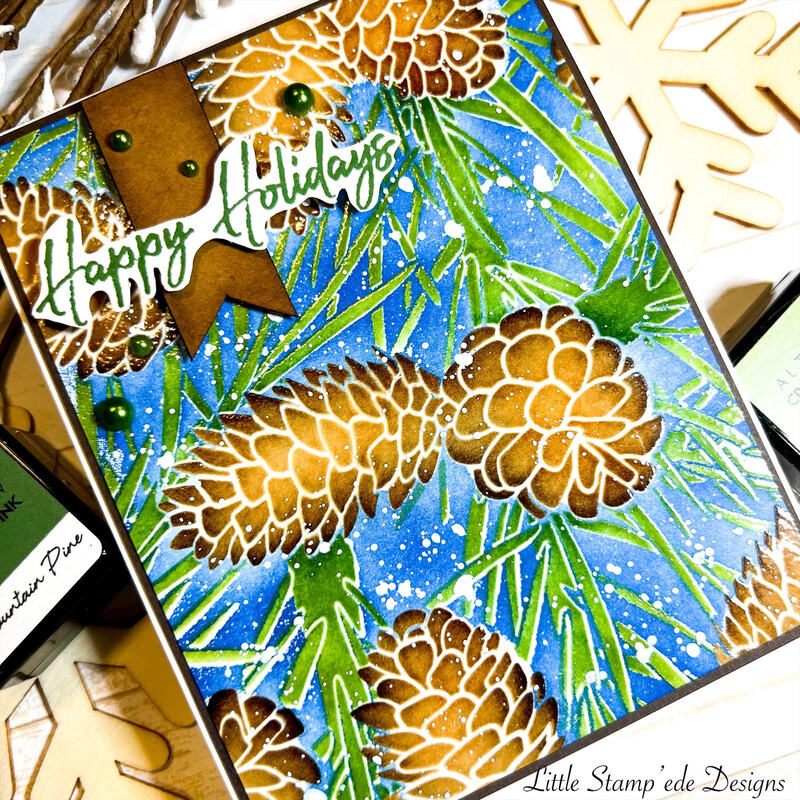
To start things off, the first thing I did was ink blend two shades of brown Distress inks with blending brushes for the Stencil B adding some depth and shading. I started with the B stencil because it worked for me to line up the pine cones first. Then I placed the B stencil back onto the pine cones and with a finger dauber, and I daubed some Wow! Embossing ink onto the pine cones and then added a little more embossing ink to the edges where the white space is to cover the entire pine cones. I then poured Clear Wow! Embossing powder onto the pine cones and heat set them with my heat gun. Then I placed the Stencil A and lined it up using the pine cones as my guide and then I ink blended two shades of green Altenew inks, Mountain Pine and Forest Glades and then repeated the clear embossing technique I did for the pine cones. After the pine cones and needles were ink blended and embossed, I was able to ink blend the white background that was left over. I wanted it to look like it was night time, so I chose to ink blend with a blue Distress Ink and I applied the ink onto the card panel. Sinc the pine cones and needles were embossed, the blue ink did not disturb the images. After I got the blue color I wanted by adding layers of ink blending until I was happy with the blue shade, I took a micro soft washcloth and wiped off the front of the card panel to make sure to wipe of any excess blue ink from the embossed images. I then added some white splatter to create a snowy effect. I wanted to make a A2 size card, so I cut down the panel to 4"x5.25" and then cut a piece of dark brown cardstock slightly larger to mat my card panel. I chose one of the Happy Holidays sentiment from Altenew's Winter Wishes stamp set, and stamped it with the Mountain Pine ink onto a piece of 110lb white cardstock. I then fussy cut the sentiment out. I then took a piece of kraft cardstock and cut out a strip and then cut the end. I then ink blended some brown Distress Ink to make it look vintage looking and popped it on the card panel with foam tape. I then placed the sentinment on top of the kraft cardstock piece and popped it up with foam tape. I then added some green pearl embellishment to complete the look. The final step was to glue the card panel onto a white 110lb card base and it was done! Stencils make ink blending a lot fun and I when the extra step with the emboss resist so I could have a night background. I could have left the background white and it still would have been beautiful, but I wanted to show you how you can also go a extra step. I love how this card turned out! See you all soon with another project! Happy Crafting Y'all!! Hey there! I am back with a super easy and quick card for the Altenew Educator Certification Program and the class for this card is Easy Die Cutting Techniques. Altenew has layering dies that are so fun and easy to use and I love the Layered Floral Cover Die is so pretty!! Seeing that it is the holiday season, I thought it would be fun to turn this die into a holiday floral card!
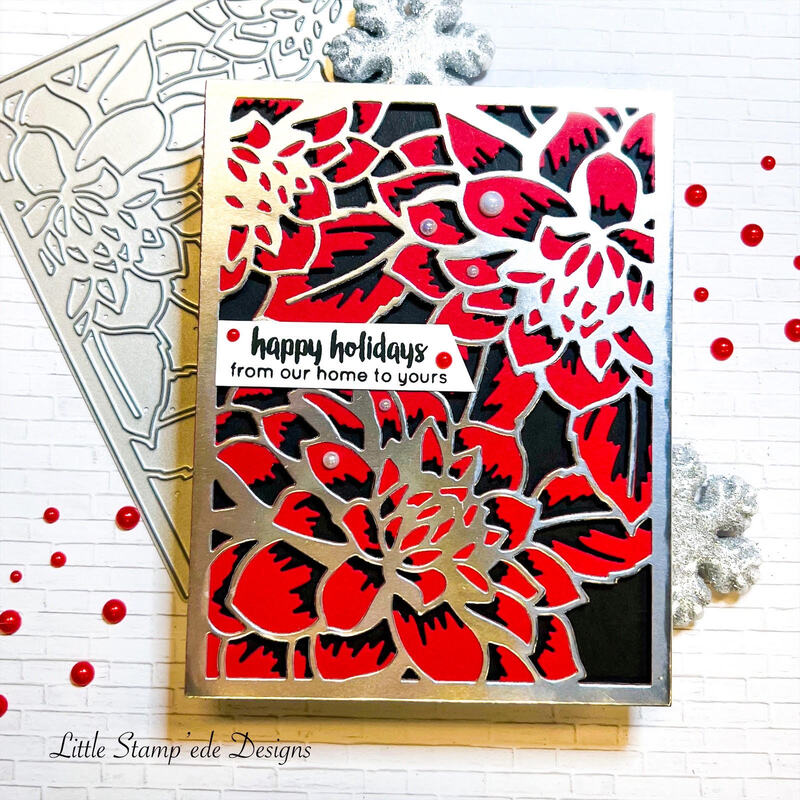
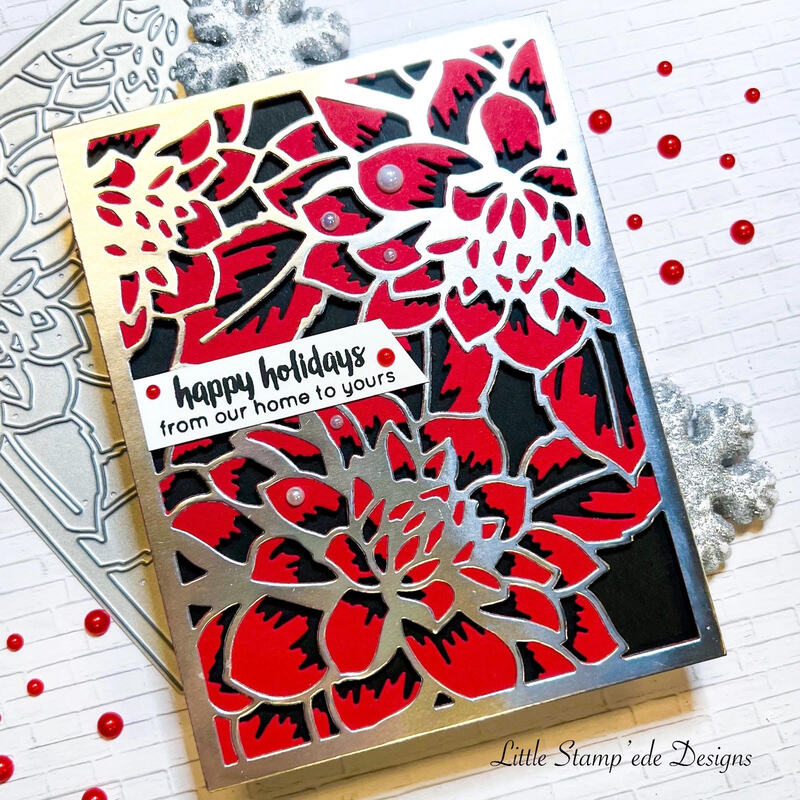
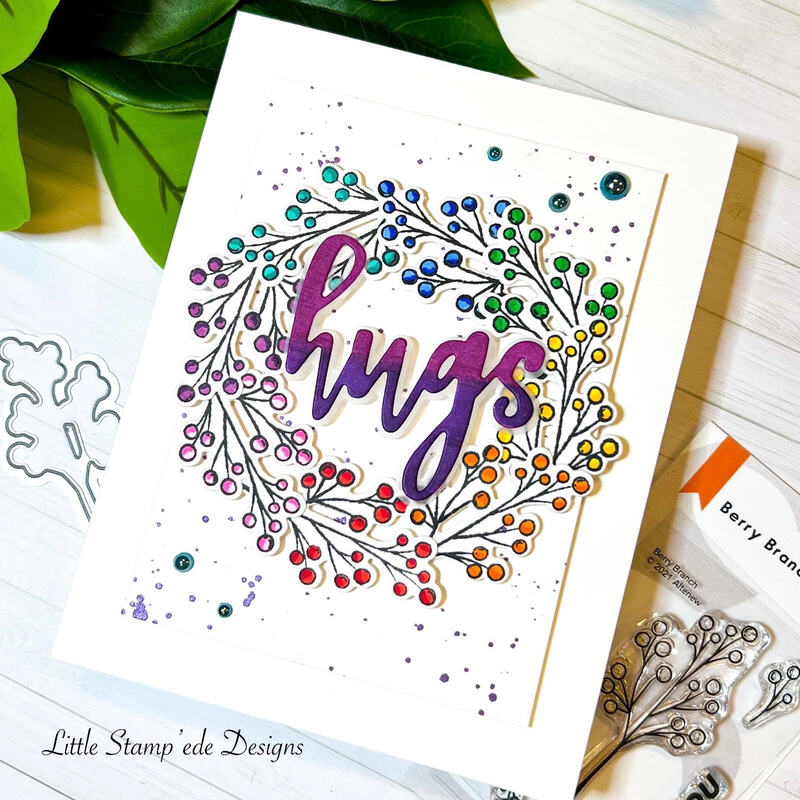
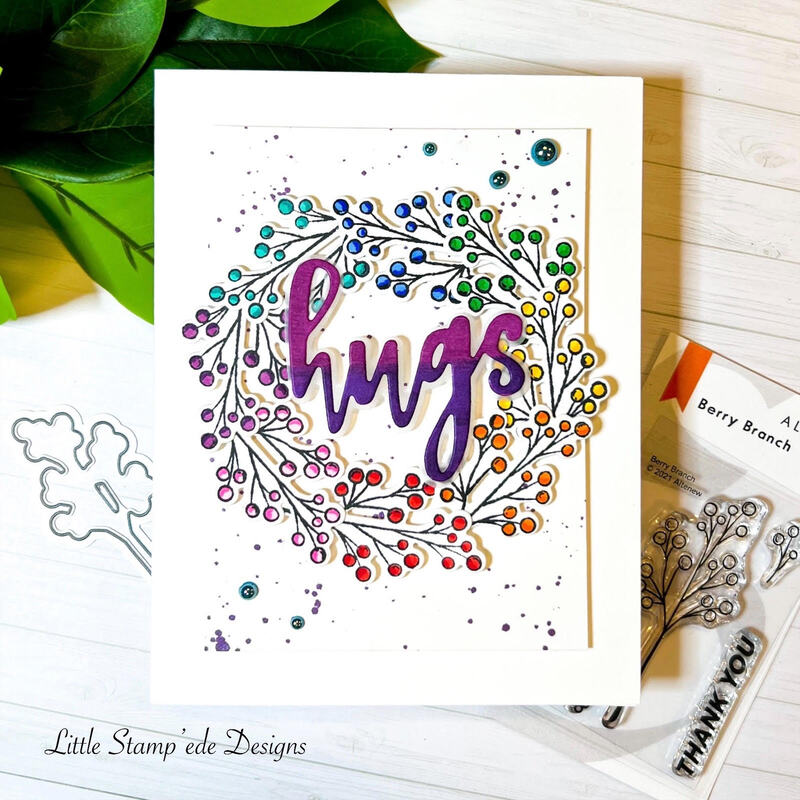
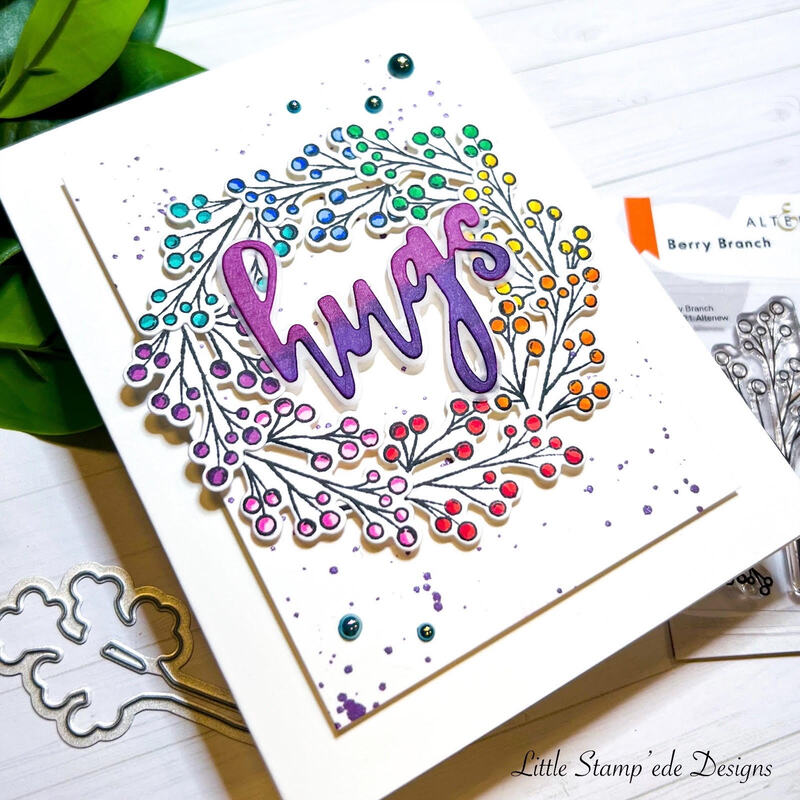
First thing I did was I cut a piece of silver metallic cardstock with the Layered Floral Cover Die A, and then I cut a piece of red cardstock with the B die. When you lay the A die cutout on top of the B die cutout, they line up perfectly! There is very little ways to mess it up unless you have it upside down. I then glued the silver piece on top of the red piece and then added some black foam tape on the back of the floral card piece. I then cut a piece of black cardstock the same size of the floral image, then I placed the silver/red floral piece with foam tape onto the black cardstock. I then stamped the holiday sentiment from the Altenew Holiday Wishes stamp set with Altenew Jet Black ink onto a piece of 110lb white cardstock and cut it out into a strip, angling the end. I then glued the sentiment onto the card panel and added some red and while pearl embellishments to complete the look. Final step, I glued the card panel onto a 110lb white card base. WOW! This card came out so pretty and so easy to make! The layering dies by Altenew are a must have! I hope you all enjoy my card and I will see you for my next project soon! Happy Crafting Y'all! Hello!! So anyone that knows me, knows that CAS (Clean and Simple) cards are a challenge for me. When I think of CAS cards, I think of more white space (or colored space if using colored cardstock) and I always want to add more! This class got my creative juices flowing and I have been wanting to use the Berry Branch stamp that I received as a free gift with a order earlier this year, so I thought it was the perfect time to play with it. I also bought the coordinating die when I got this free stamp, so I wanted to use that too. One of the looks I love is a simple wreath, and the Berry Branch was perfect for a wreath!
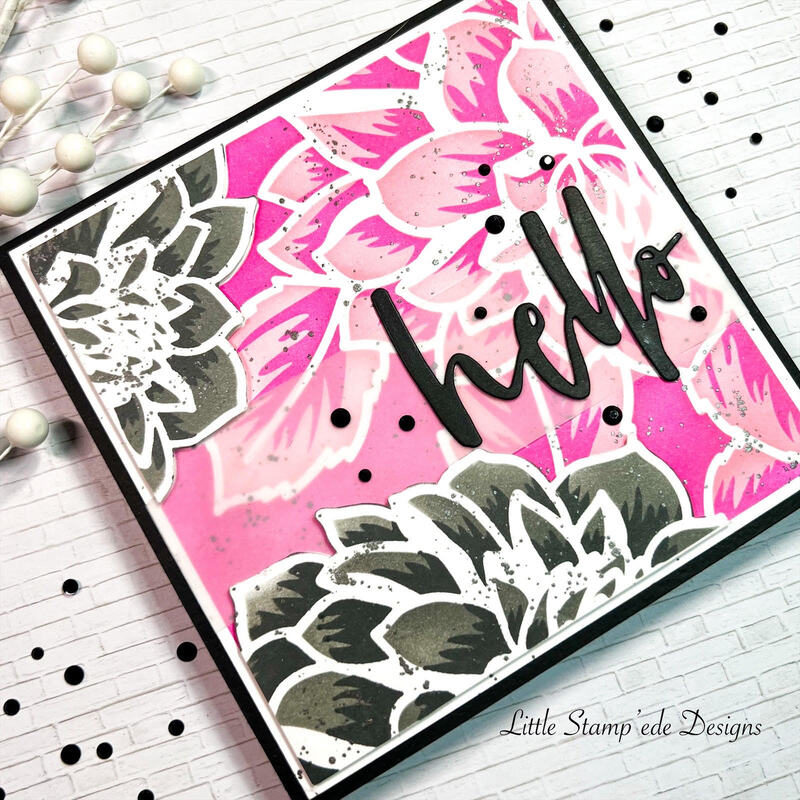
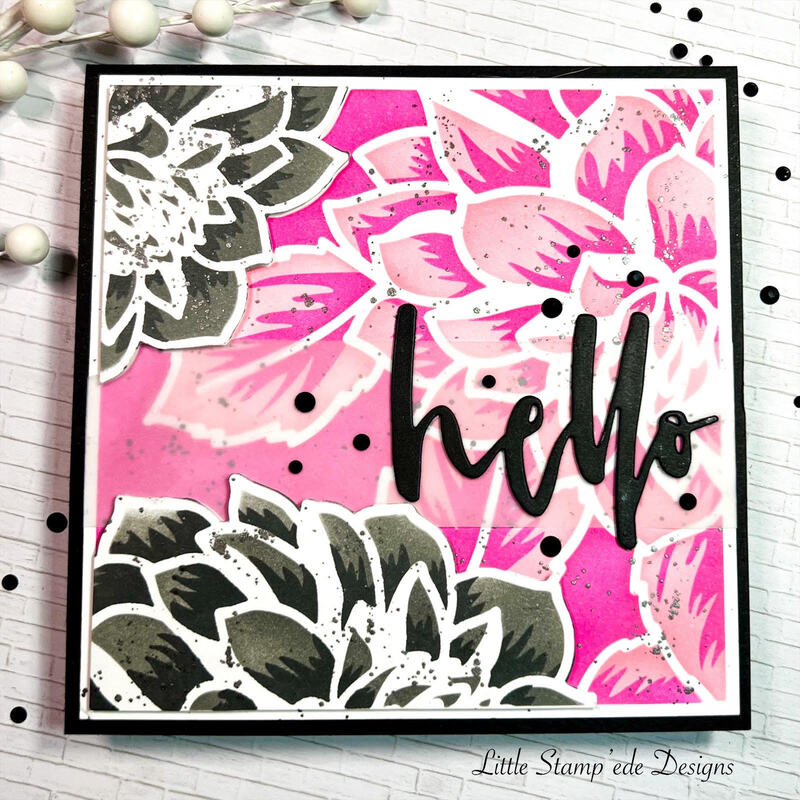
First, on 110lb white cardstock, I stamped out eight Berry Branches with black Memento ink and cut them out with the coordinating die. For the color scheme, I wanted to do rainbow colors, so I colored each branch a different color of the rainbow using Copic markers. I then cut out Hugs die in white 110lb cardstock and the shadow in vellum. I then used two shades of purple Copics and colored the Hugs sentiment in a gradient style. I then cut a piece of white cardstock measured 3.5"x4.75" and splattered it with purple Distress Mica Spray. I then arranged the Berry Branches the way I wanted them to be, and then took a piece of Press N Seal and laid it on top of the branches to keep them in the arrangement I wanted them to be. I then flipped it over and added foam tape to the back of the branches, then flipped it back over and placed it onto the splattered card panel and peeled off the Press N Seal. I then glued the Hugs die onto the vellum shadow and then popped it in the middle of the wreath with foam tape. I then popped the card panel onto a white card base with foam tape, and them added some teal pearl embellishments to complete the look. I think this card looks very CAS and very beautiful. It has the right amout of color and still has that simple look! I hope you have a great day and I will see you soon with another project! Happy Crafting Ya'll!! Hey everyone! For the Altenew Educator Certification Program, I am sharing a card for the Celebration Stencil Techniques class. I love the Layering Dahlia stencil from Altenew and I thought it was the perfect stencil to use for this class project. Layering stencils are so fun to use and they are so perfect for a quick and easy card that is so beautiful! This class was perfect excuse to break this stencil out to play with! For this card, I chose to keep it the 6x6 size, which is the same size of the stencil. I love making different sized cards!
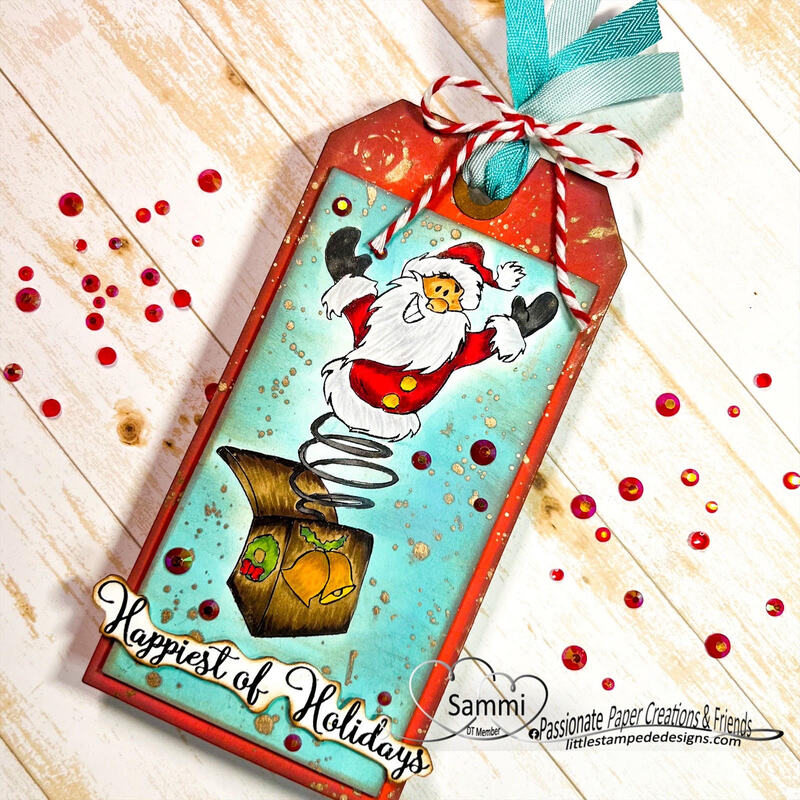
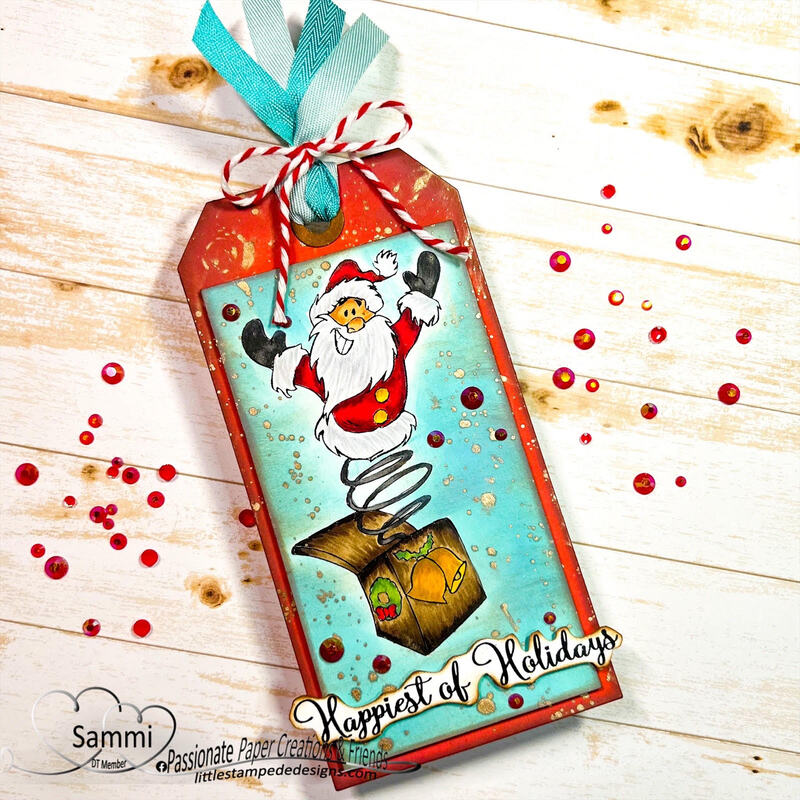
For the A stencil, I applied a light pink ink from Catherine Pooler inks with a blending brush, and then I lined the B stencil up to match the light pink image and applied a darker pink ink. After I finished with the pink ink, it was a little too bright for me, so I decided to make another panel using light gray and dark gray inks. I then fussy cut a couple of the dahlia's out and popped them onto the pink card panel with some foam tape. To add a little pizazz, I added some splatter using some Distress Mica Spray. I then cut out the Hello die in black card stock and cut a piece of vellum that was 7" long. I then placed the vellum in the middle of the card panel, wrapping the vellum around to the back of the card panel so I could glue the vellum on the back of the card panel to secure it. I then glued the Hello sentiment on top of the vellum strip, and then added some black jeweled embellishments. I then glued the card panel onto a black card base. I love how easy this card is to make and how eye catching it is! I hope you have an amazing day and I will see you soon with my next project! Happy Crafting Y'all! Hello crafty friends! This week Joy Clair is the sponsor for the Passionate Paper Creations & Friends Design Team and I just love the digital Santa's! There were three santa images, and I chose to go with the Jack In The Box Santa because it reminded me of a vintage toy and I love anything vintage! I need some holiday tags, so I decided to make a tag for this project.
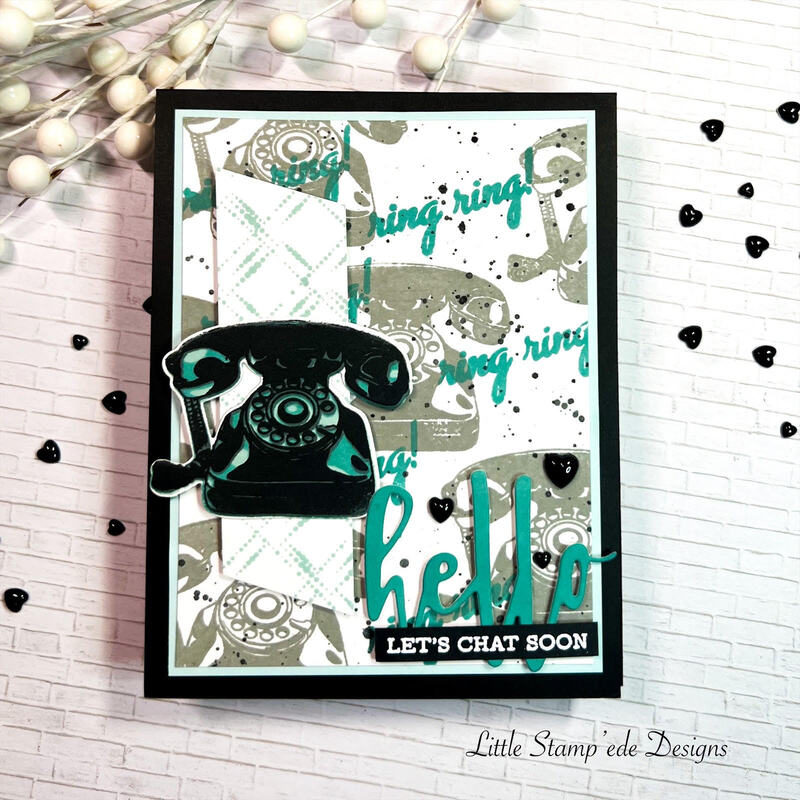
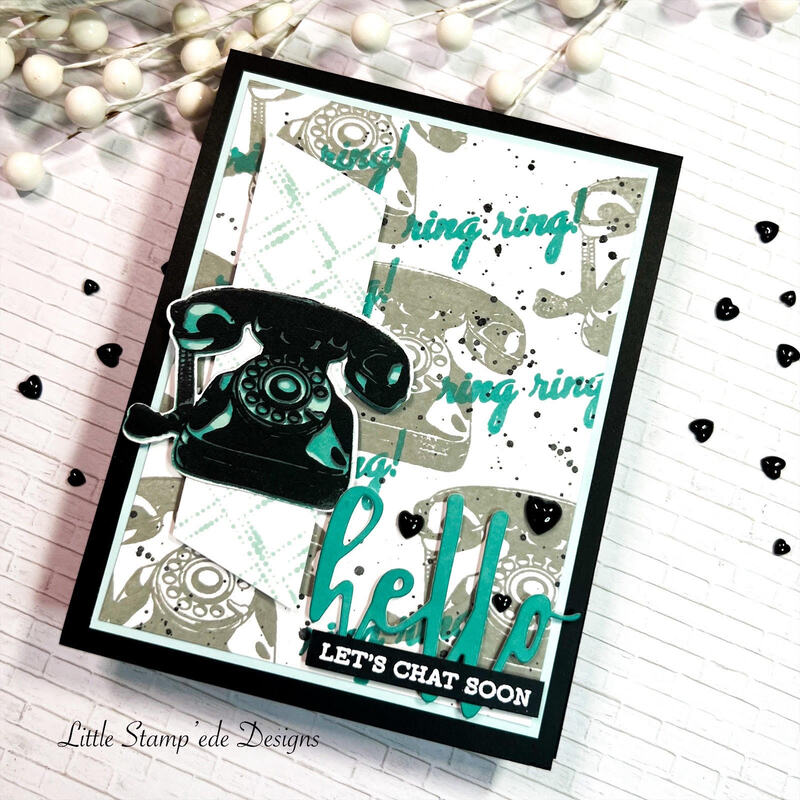
First, I cut out a tag with my Tim Holtz tag dies using the biggest tag die. I then printed my santa image with my laser printer and cut it out in a retangle to fit my tag. I then masked the santa image with post-it notes and ink blended the background with Distress Oxide inks. I then added some metallic splatter with Distress Mica Spray and colored the santa image with Copic markers. I then ink blended the tag with Distress Oxide ink and added some metallic splatter using Distress Mica Spray. I then popped up the rectangle with the santa image onto the tag using foam tape, then fussy cut the sentiment out, popping it up with foam tape onto the tag, and then added some red jewel embellishments. The final touch was adding some ribbon and twine. I love how this came out! The colors make it feel retro! Hello crafty friends!! Today, I want to share a card I made for the Altenew Educator Certification Program's class - For The Guys. I love making masculine cards! When I took this class, all I could think about was the It's For You stamp and die set, which is a set that I LOVE! I love vintage and this phone is so vintage and I love it!
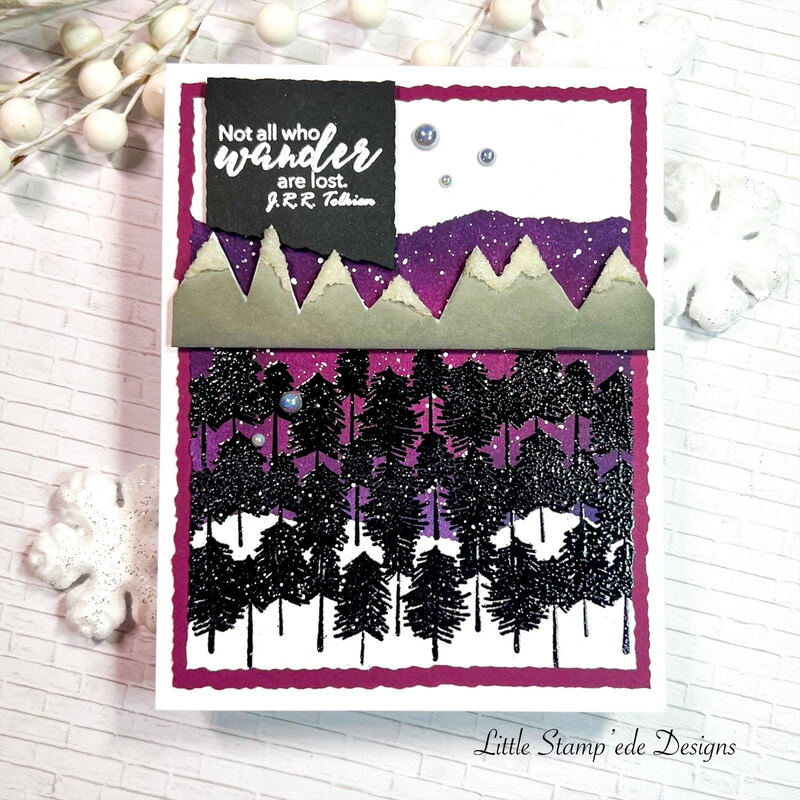
The phone is a layering stamp set, so I took the last image in the layering sequence since it has the most detail and stamped it multiple times on a piece of card stock in gray ink in a random order. I then randomly stamped the Ring Ring sentiment in between the phones in a teal ink. The inks I used were Catherine Pooler inks. I then took some Jet Black Altenew ink and water to add some splatter on my background piece. Once that was done, I cut it down to 3.75"x5" and then added a minty colored cardstock for the mat. I then stamped my layering phone in a light mint, teal and black (in that order) and then used the coordinating die to cut it out. To add something extra, I decided to stamp some cardstock with the Altenew Dotted Diamonds stamp, which is one of my FAVORITE background stamps, and cut a strip to go behind my phone. I then took some teal ink and slid the ink pad on some cardstock so I would have matching colored cardstock and cut out the Hello die and popped it up with some foam tape. I then heat embossed the Let's Chat Soon sentiment from the Altenew Sentiment Strips set on black card stock with white embossing powder and cut out with my scissors and glued it on top of the hello piece. I then glued the card panel onto a black 110lb card base and added some black jelly heart embellishments to tie it al together. I love this card and think that it is a great masculine card for the guys. I hope you enjoy it and I will see you soon with another Altenew project! Happy Crafting Y'all!! Hey everyone! Today I am here showcasing what I created for the Seasonal Scene Building class in the Altenew Educator Certification Program. One of my favorite scenes are the mountains, which makes sense since I live in the mountains! I also love a wintery snowy scene, so that is what I wanted to capture in this scene. I felt that the Wanderlust stamp set was perfect for this card!
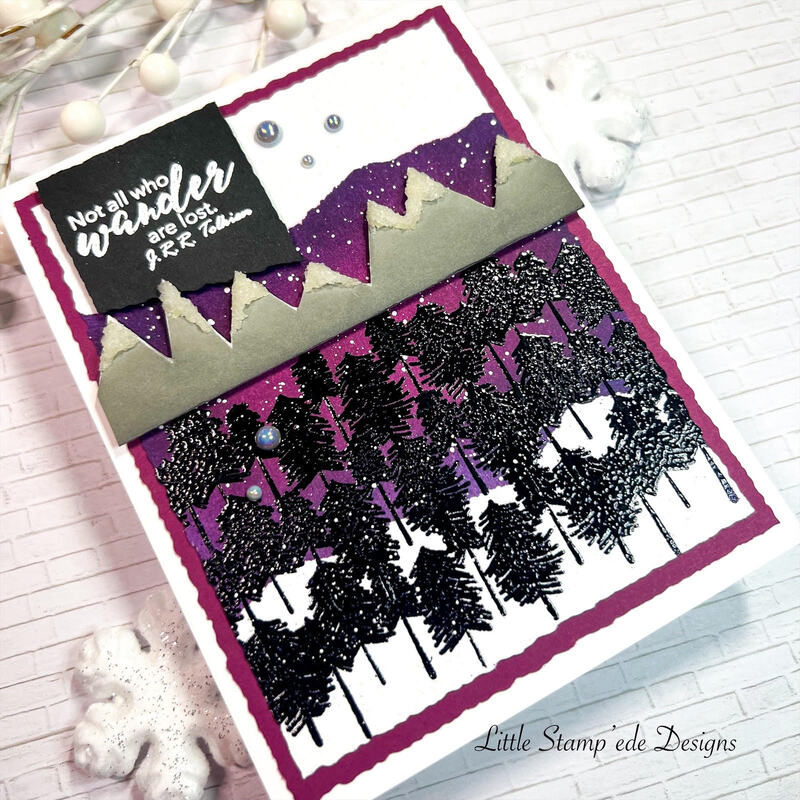
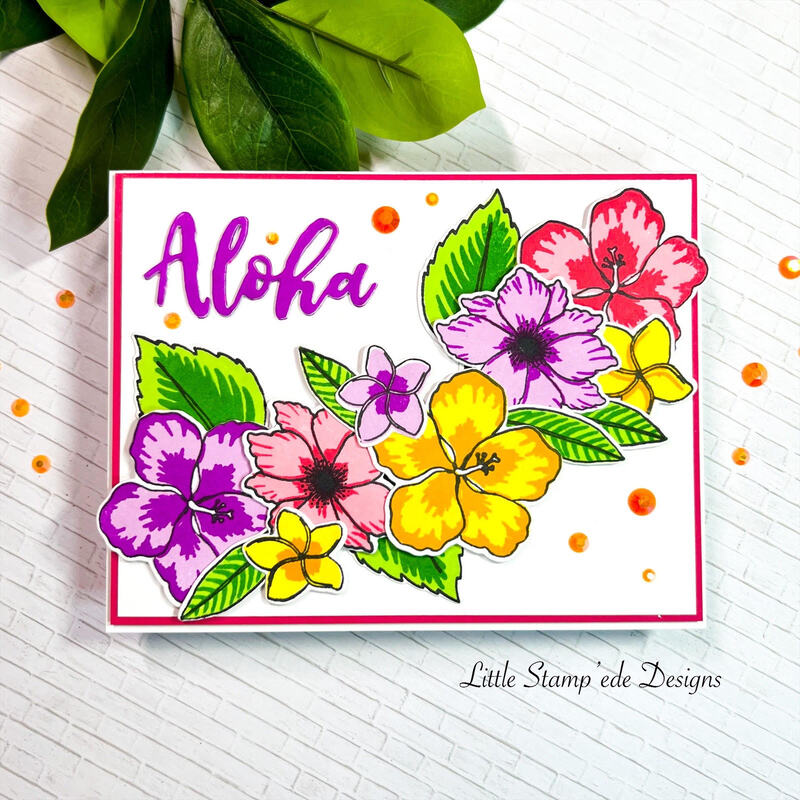
First, I decided that I wanted to do some ink blending, so I pulled out my Distress inks and tore some 80lb card stock to create a ripped edge. Using some Mint tape, I secured the 3.75"x5" card panel cut by Tim Holtz's Deckled Trimmer to my glass mat, then taped down two pieces of torn card stock onto the card panel, one towards the top and one towards the bottom. Using a ink blending tool, I first added the purple ink and then I added the blue ink on the top and sides of the space. I then came back in with the purple to make sure that the inks were blended well. I then took off the ripped cardstock to display the wintery sky. I then added some white ink splatter to the image for a snowy look. I wanted to heat emboss the trees, so I stamped three rows of trees in Versamark and embossed them with Ebony embossing powder from Wow! Embossing Powders. I then stamped the mountain image onto a separate piece of card stock in gray ink, and then fussy cut the mountain out. I then added some Snow Grit Paste on the peaks of the mountains for snow on the mountains. I then popped the mountains onto the panel with foam tape. I then stamped the image with Versamark onto a piece of black card stock and embossed the sentiment with white embossing power from Wow!. I then cut out the seniment with the Deckled trimmer and popped it up with foam tape onto the card panel. Then, using the Deckled trimmer, I cut a mat for the card panel with some purple card stock and then glued it onto a white 110lb card base. For the final touch, I added some gray pearl embellishments. I love this wintery scene so much! See you all soon with my next class! Happy Crafting Y'all!! Hello crafty friends! Today I am sharing a card for my All About Layering 2 class with the Altenew Educator Certification Program and I wanted to go tropical! With the cold weather coming, I am dreaming of Hawaii!!
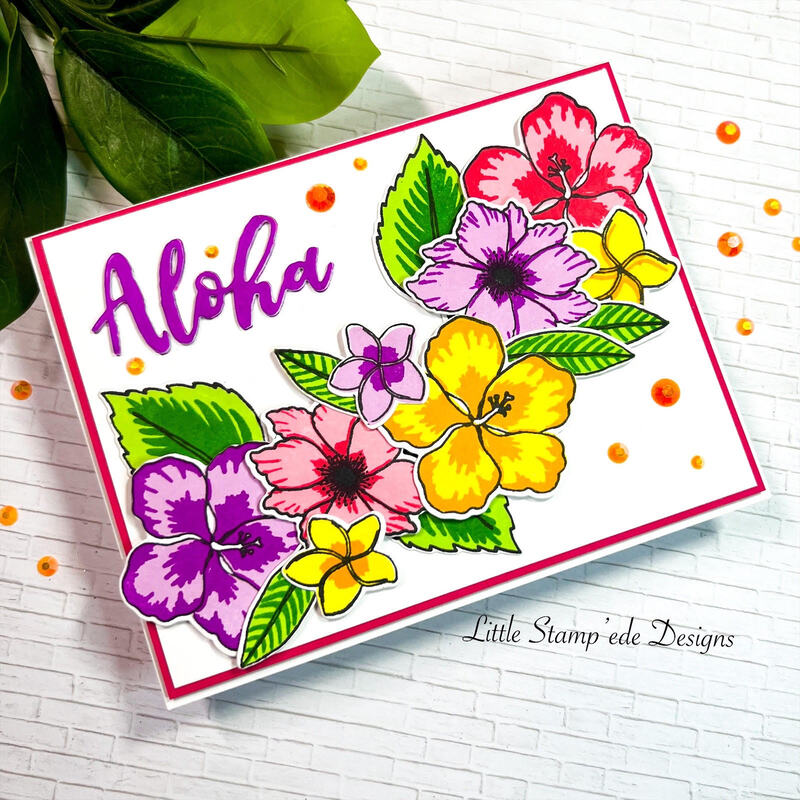
With tropical in mind, I decided to go with the Totally Tropical stamp and die set. I have a limited Altenew ink supply, so I used some Catherine Pooler inks for this card to achieve the bright colors I wanted to get. I started by stamping the images onto a piece of 110lb card stock. I chose to go with a heavy card stock because I wanted sturdy flowers once I die cut them out. I stamped the images first with Jet Black Altenew ink and then stamped the lighter color for the background part of the flower and then I stamped the darker color. I wanted purples, pinks, yellows and oranges and I stamped several of each color. I then stamped the leaves, again stamping the lighter color and then the darker color of ink. After I stamped all of the flowers and leaves, I used the coordinating dies and cut them out with my die cutting machine. After all the flowers and leaved were cut out, I rearranged them onto a prepared 5.25"x4" card panel until I was happy with the arrangement, and then took a picture with my phone so I knew how to arrange them, since I would need to take them off to add glue and foam tape. After I put the flower arrangement back together using glue and foam tape, I then cut out the Aloha sentiment with the Aloha word die three times. I then glued them on top of each other to add dimension and glued the sentiment onto the card panel. I then took a piece of dark pink cardstock and cut it to size to mat the card panel. I then glued the card panel onto a white card base made of 110lb white cardstock. I then added some orange gem embellishments to add the final touch. I think the card came out beautifully and it definitely reminds me of Hawaii!! See you all soon for the next class project! Happy Crafting Y'all!! Hey everyone!!! Happy weekend to you!! Today I am bringing you a card I made as part of the PPCF Design Team for our sponsor this week - Di's Digi Stamps! I chose to play with this adorable mouse and poinsettia image, which is soooo cute!
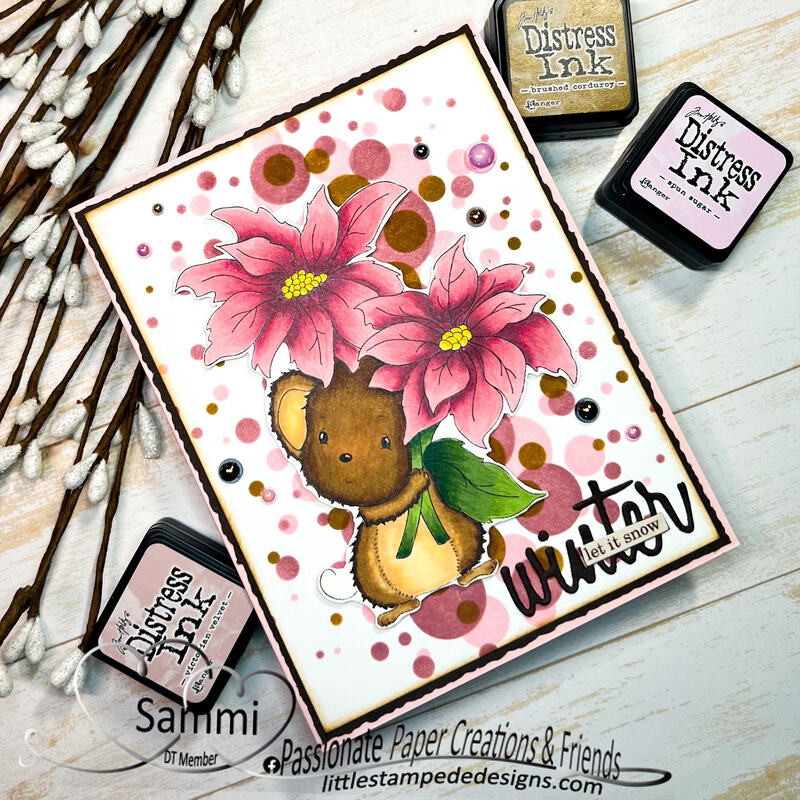
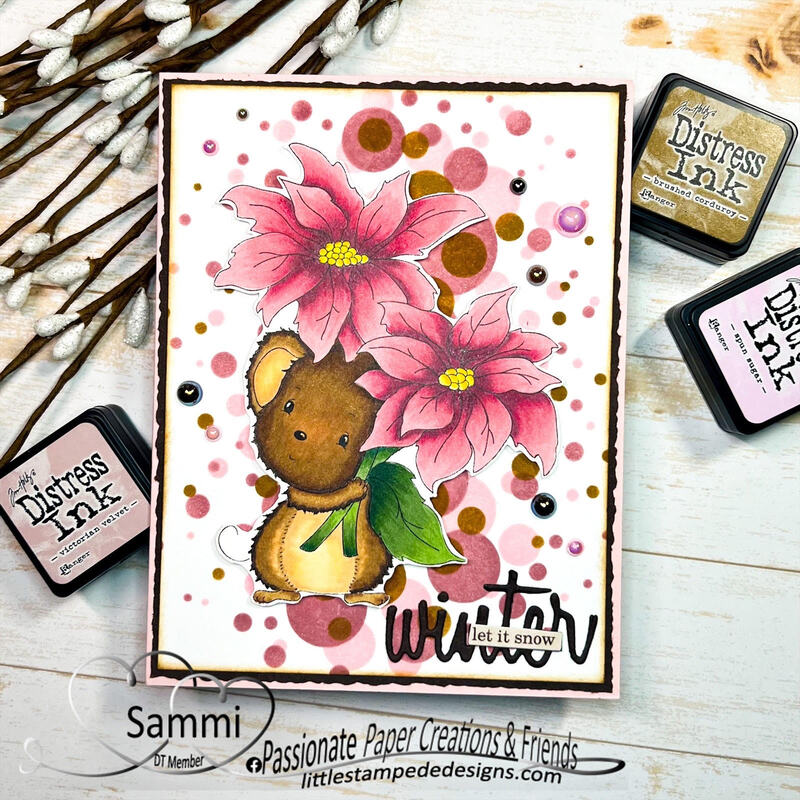
The first thing I did was I sized the image using Publisher and printed the image using a laser printer. I then fussy cut the image out. I then colored the image using Copic markers. I then got out my Bokeh Layering stencil from Taylored Expressions and used Distressed Inks and blending brushes to add the bokeh spots in the middle of the card panel. I then popped the colored mouse with foam tape. I then die cut the word Winter from the holiday word dies from Tim Holtz three times and glued them together using Bearly Art Glue to add depth. I then picked out a small sticker from the Tim Holtz Christmas sticker book to add to the Winter word and added it on top of the word Winter. I then picked out a light pink 110lb piece of cardstock for my card base, and then cut a piece of dark brown cardstock with the Tim Holtz Deckled Trimmer to mat the card panel and then popped it onto the card base with foam tape. Final finish is adding some embellishments from Trinity Stamps! The card came out so cute! The mouse has such a sweet face! Hope you enjoy my creation and see you next time! Happy Crafting Y'all! |
Follow Sammi:AuthorI love to create and invite you to join me in my journey in this crazy paper crafting world we live in! Archives
February 2022
Categories |


 RSS Feed
