|
Hello! I am back with another project for the Altenew Educator Certification Program and the class is Easy Ink Blending Techniques. For this card, I wanted to showcase ink blending a few different ways. When you apply ink with stencils, you are ink blending your ink. For this project, I also wanted to ink blend the background, so I needed to use the emboss resist technique as well. I live in the mountains, so I gravitate to all woodsy stamps, dies and stencils and I love the Classic Pine layering stencil from Altnew! It is perfect for anyone that loves the outdoors! To start things off, the first thing I did was ink blend two shades of brown Distress inks with blending brushes for the Stencil B adding some depth and shading. I started with the B stencil because it worked for me to line up the pine cones first. Then I placed the B stencil back onto the pine cones and with a finger dauber, and I daubed some Wow! Embossing ink onto the pine cones and then added a little more embossing ink to the edges where the white space is to cover the entire pine cones. I then poured Clear Wow! Embossing powder onto the pine cones and heat set them with my heat gun. Then I placed the Stencil A and lined it up using the pine cones as my guide and then I ink blended two shades of green Altenew inks, Mountain Pine and Forest Glades and then repeated the clear embossing technique I did for the pine cones. After the pine cones and needles were ink blended and embossed, I was able to ink blend the white background that was left over. I wanted it to look like it was night time, so I chose to ink blend with a blue Distress Ink and I applied the ink onto the card panel. Sinc the pine cones and needles were embossed, the blue ink did not disturb the images. After I got the blue color I wanted by adding layers of ink blending until I was happy with the blue shade, I took a micro soft washcloth and wiped off the front of the card panel to make sure to wipe of any excess blue ink from the embossed images. I then added some white splatter to create a snowy effect. I wanted to make a A2 size card, so I cut down the panel to 4"x5.25" and then cut a piece of dark brown cardstock slightly larger to mat my card panel. I chose one of the Happy Holidays sentiment from Altenew's Winter Wishes stamp set, and stamped it with the Mountain Pine ink onto a piece of 110lb white cardstock. I then fussy cut the sentiment out. I then took a piece of kraft cardstock and cut out a strip and then cut the end. I then ink blended some brown Distress Ink to make it look vintage looking and popped it on the card panel with foam tape. I then placed the sentinment on top of the kraft cardstock piece and popped it up with foam tape. I then added some green pearl embellishment to complete the look. The final step was to glue the card panel onto a white 110lb card base and it was done! Stencils make ink blending a lot fun and I when the extra step with the emboss resist so I could have a night background. I could have left the background white and it still would have been beautiful, but I wanted to show you how you can also go a extra step. I love how this card turned out! See you all soon with another project! Happy Crafting Y'all!! 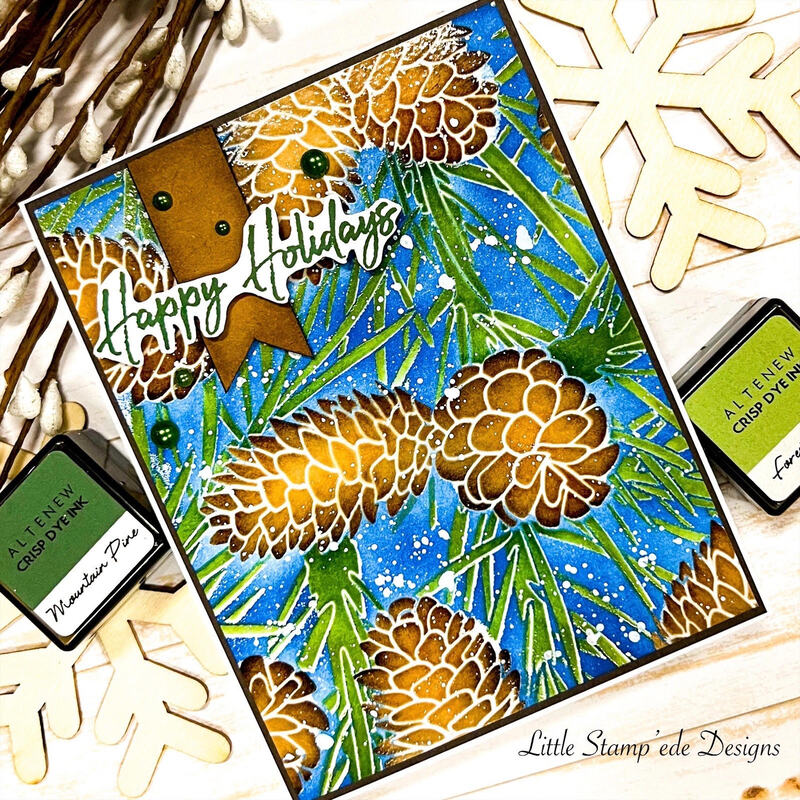  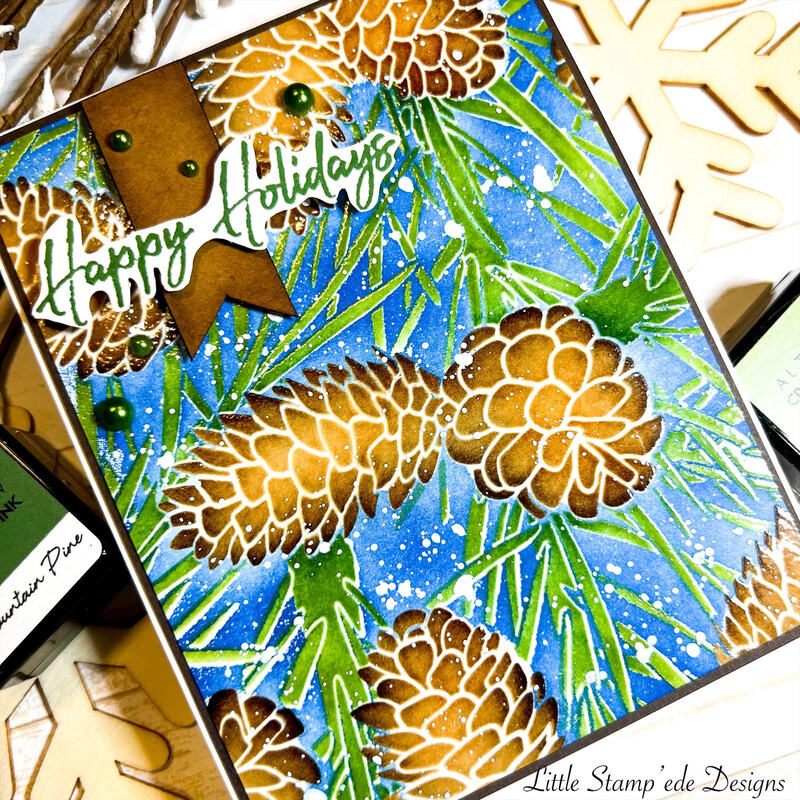 |
Follow Sammi:
AuthorI love to create and invite you to join me in my journey in this crazy paper crafting world we live in! 
Archives
February 2022
Categories |
 RSS Feed
